


After discovering many outdoor patio tables are out of stock, delayed, or really expensive right now, we decided to make our own DIY table for our screened in porch—which leads us to this guide on how to build an outdoor table!
I got our DIY farmhouse table plans from Ana White's website and decided to use that as our guide. These plans are for an 8-foot table, but we slightly modified the plans to make a 10-foot table instead. We also made it a little bit more narrow so that it can fit through the door and have room for a seating area on our porch. (Here is another set of plans for an even simpler table.)
Today I'm sharing every step in our journey of learning how to build an outdoor table!
DIY Outdoor Patio Table Cost Breakdown
Before I share all of the steps that went into making an outdoor table, I wanted to include our total cost breakdown.
We found that building a table is significantly cheaper than buying one, so we set off and hoped it would be a success!
- Lumber: $205.68
- Stain: $9.78 (we only used 1/3 of the container)
- Polyurethane: $17.97 (we only used 1/4 of the container)
- 2 1/2" screws: $28.47
- 4" screws: $5.12
- Wood filler: $4.97
- Sandpaper sheets: $9.94
- TOTAL COST: $281.93

1. Purchase Tools and Materials
You can find details on all of the materials required for the outdoor table in Ana White's farmhouse table plans, including:
- Lumber
- Wood glue
- Wood filler
- 2 1/2" screws
- 4" screws
- Sandpaper
- Wood stain (this stain has a LOT more gray in it than it looks like from the photos online)
- Polyurethane (we used an interior polyurethane since our table will always be covered, but you’d want to choose an outdoor one if your table will stay outside)

You'll also need a few tools in addition to these materials. Here's what we used to build our outdoor table:

2. Measure and Make Cuts
After gathering all the tools and materials, it's time to start measuring and cutting. I am a paper person, so I printed our table plans before measuring and making cuts.
As I mentioned before, we modified the plans to make the table 10-feet long instead of 8-feet long, and also made it slightly more narrow so it can fit through a door. I noted all of these changes on the printed plans, and then we were ready to roll.
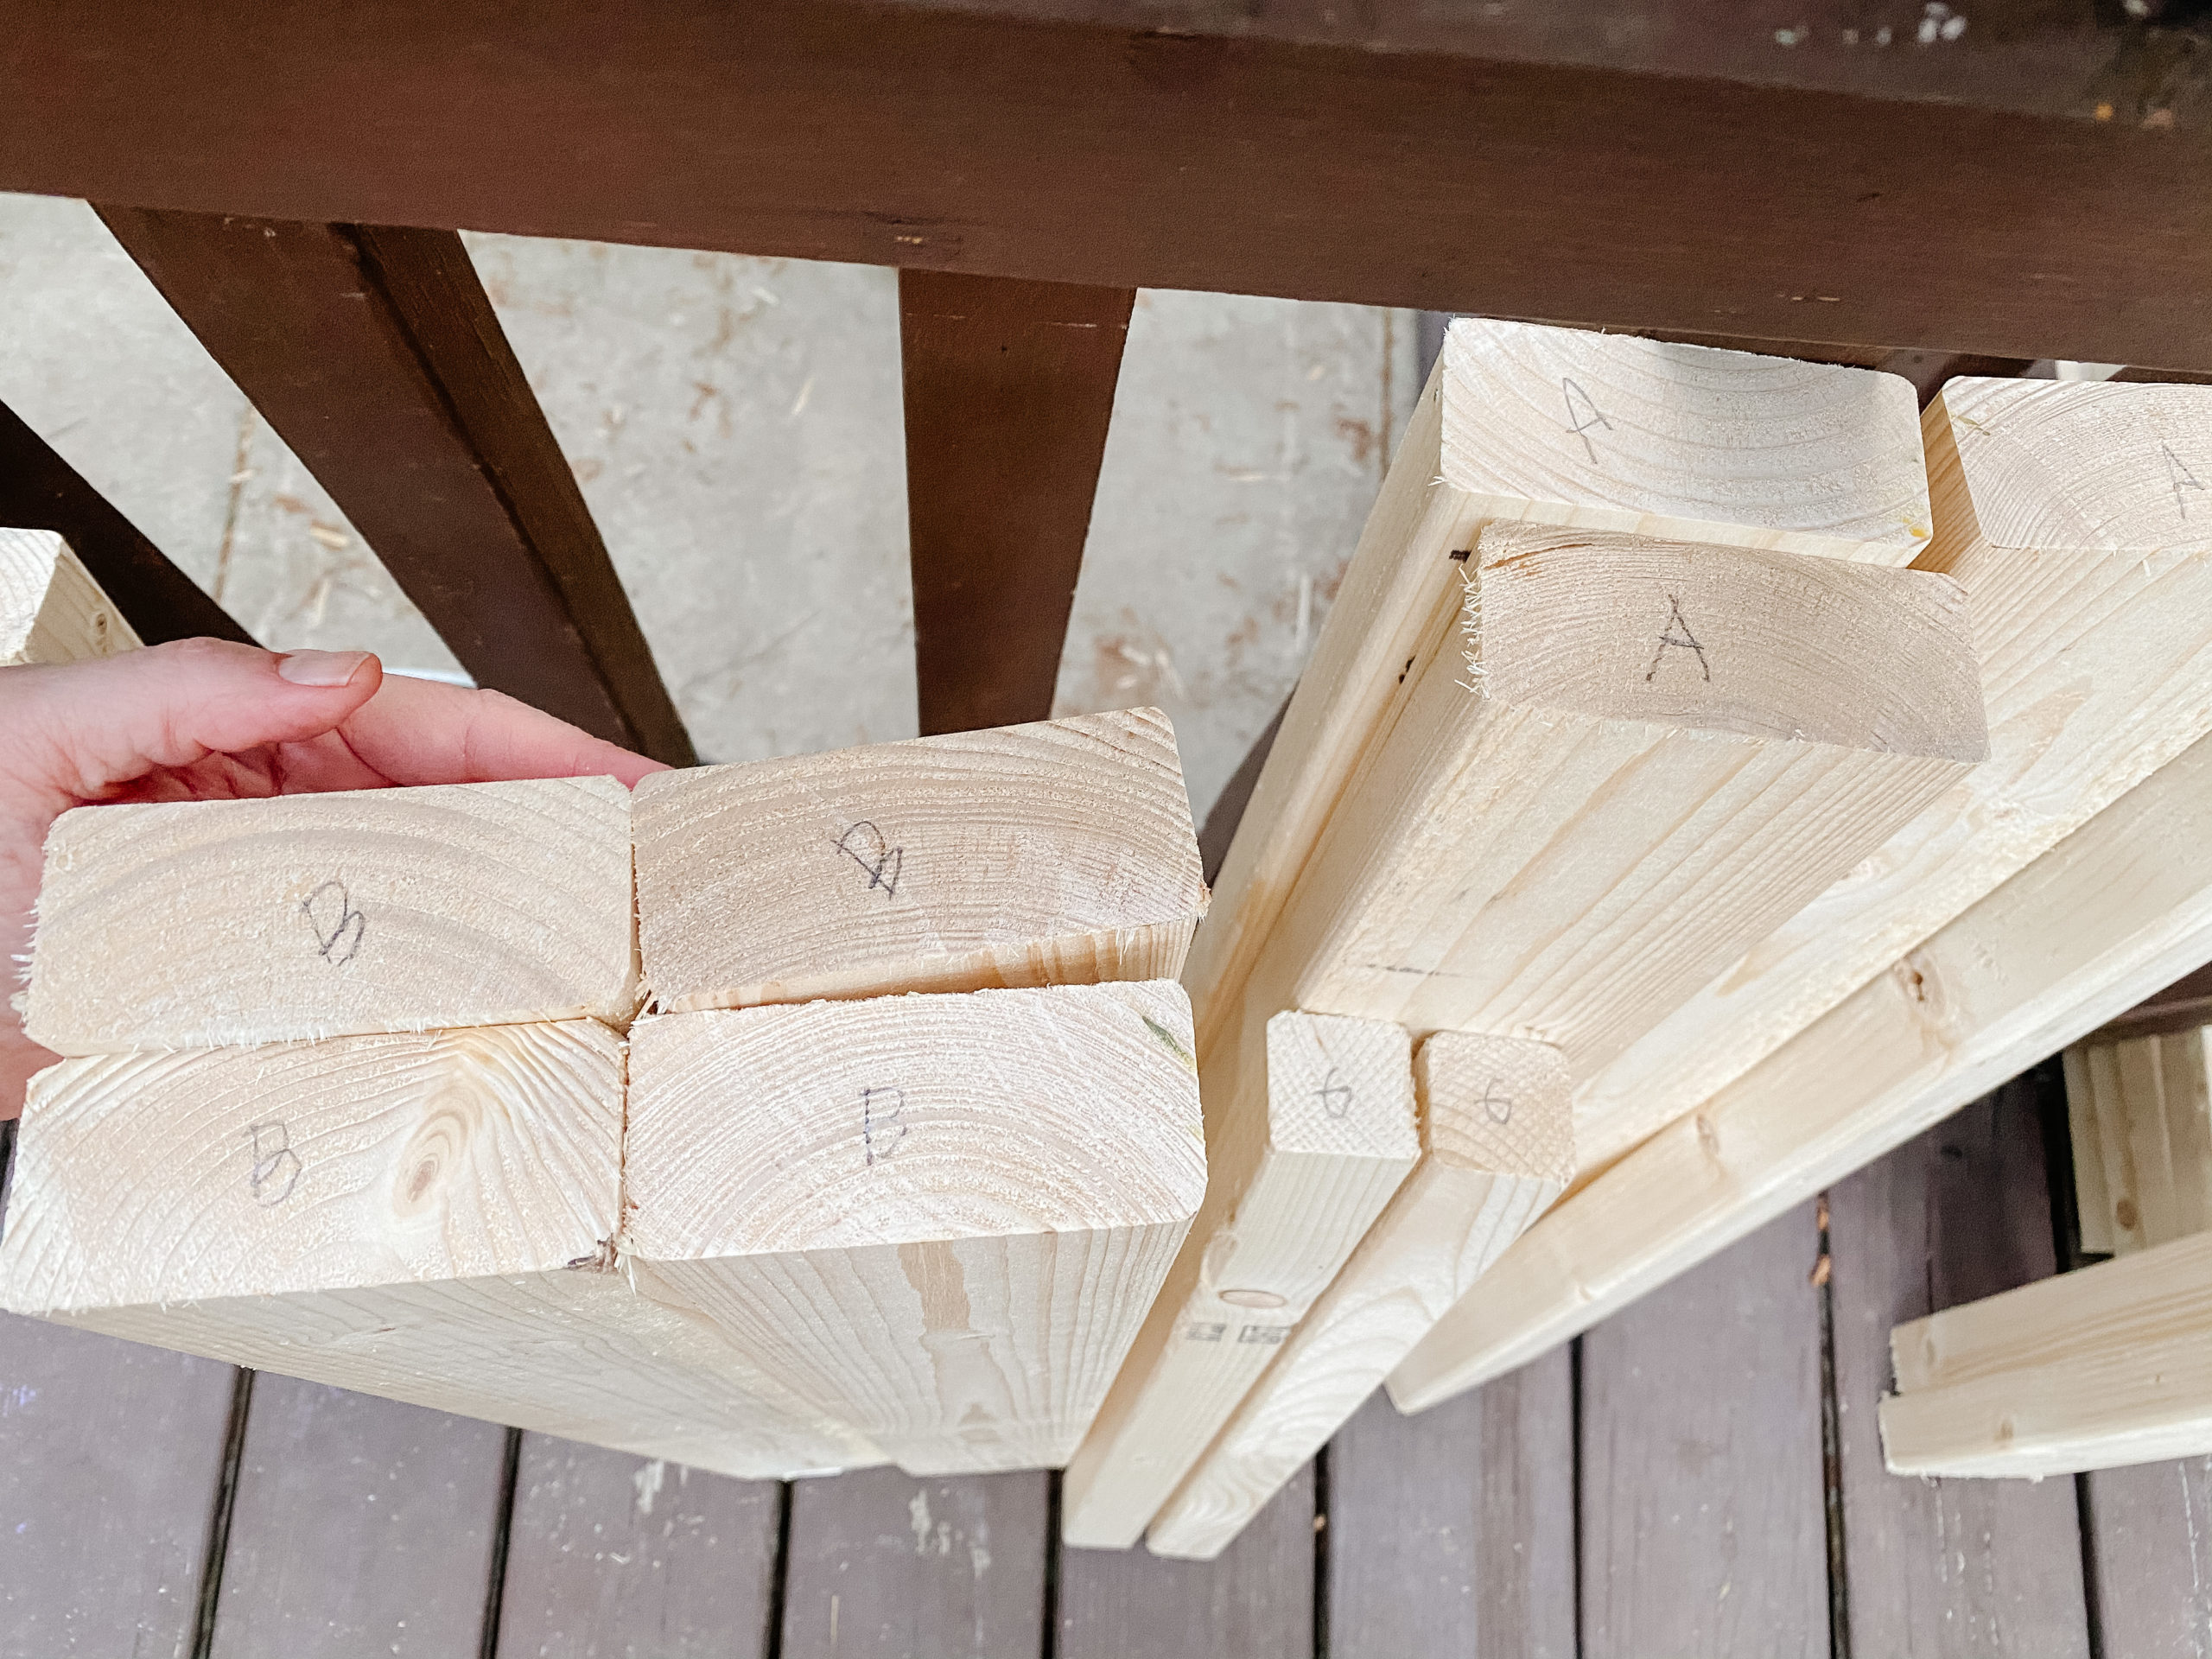
I labeled the tops of the boards with the coordinating letters from the cut list, which made it much easier when putting the table together. We finished all of the cuts in one afternoon and then called it a day.
3. Notch Out the Boards
Once all of the cuts are done, the next step is to notch out boards that will be used for the legs of the table. I did this step on my own, so let this be a reminder that you don't always need your spouse around for every step of a project! You can do more than you think you can! (Just remember to be safe, and obviously wait for a helper if the project calls for it.)
With that said, it was a little more difficult and time-consuming to complete this step than I thought it would be. You start by making a bunch of 1 1/2-inch deep cuts in the wood, then use a hammer and chisel to carve them out and create the notch. I had to call it quits after completing this step, then came back to it with Justin later.
Chiseling out the notches seemed like it would be tricky. I let Justin take the lead on this step because he was a little better at it than I was.
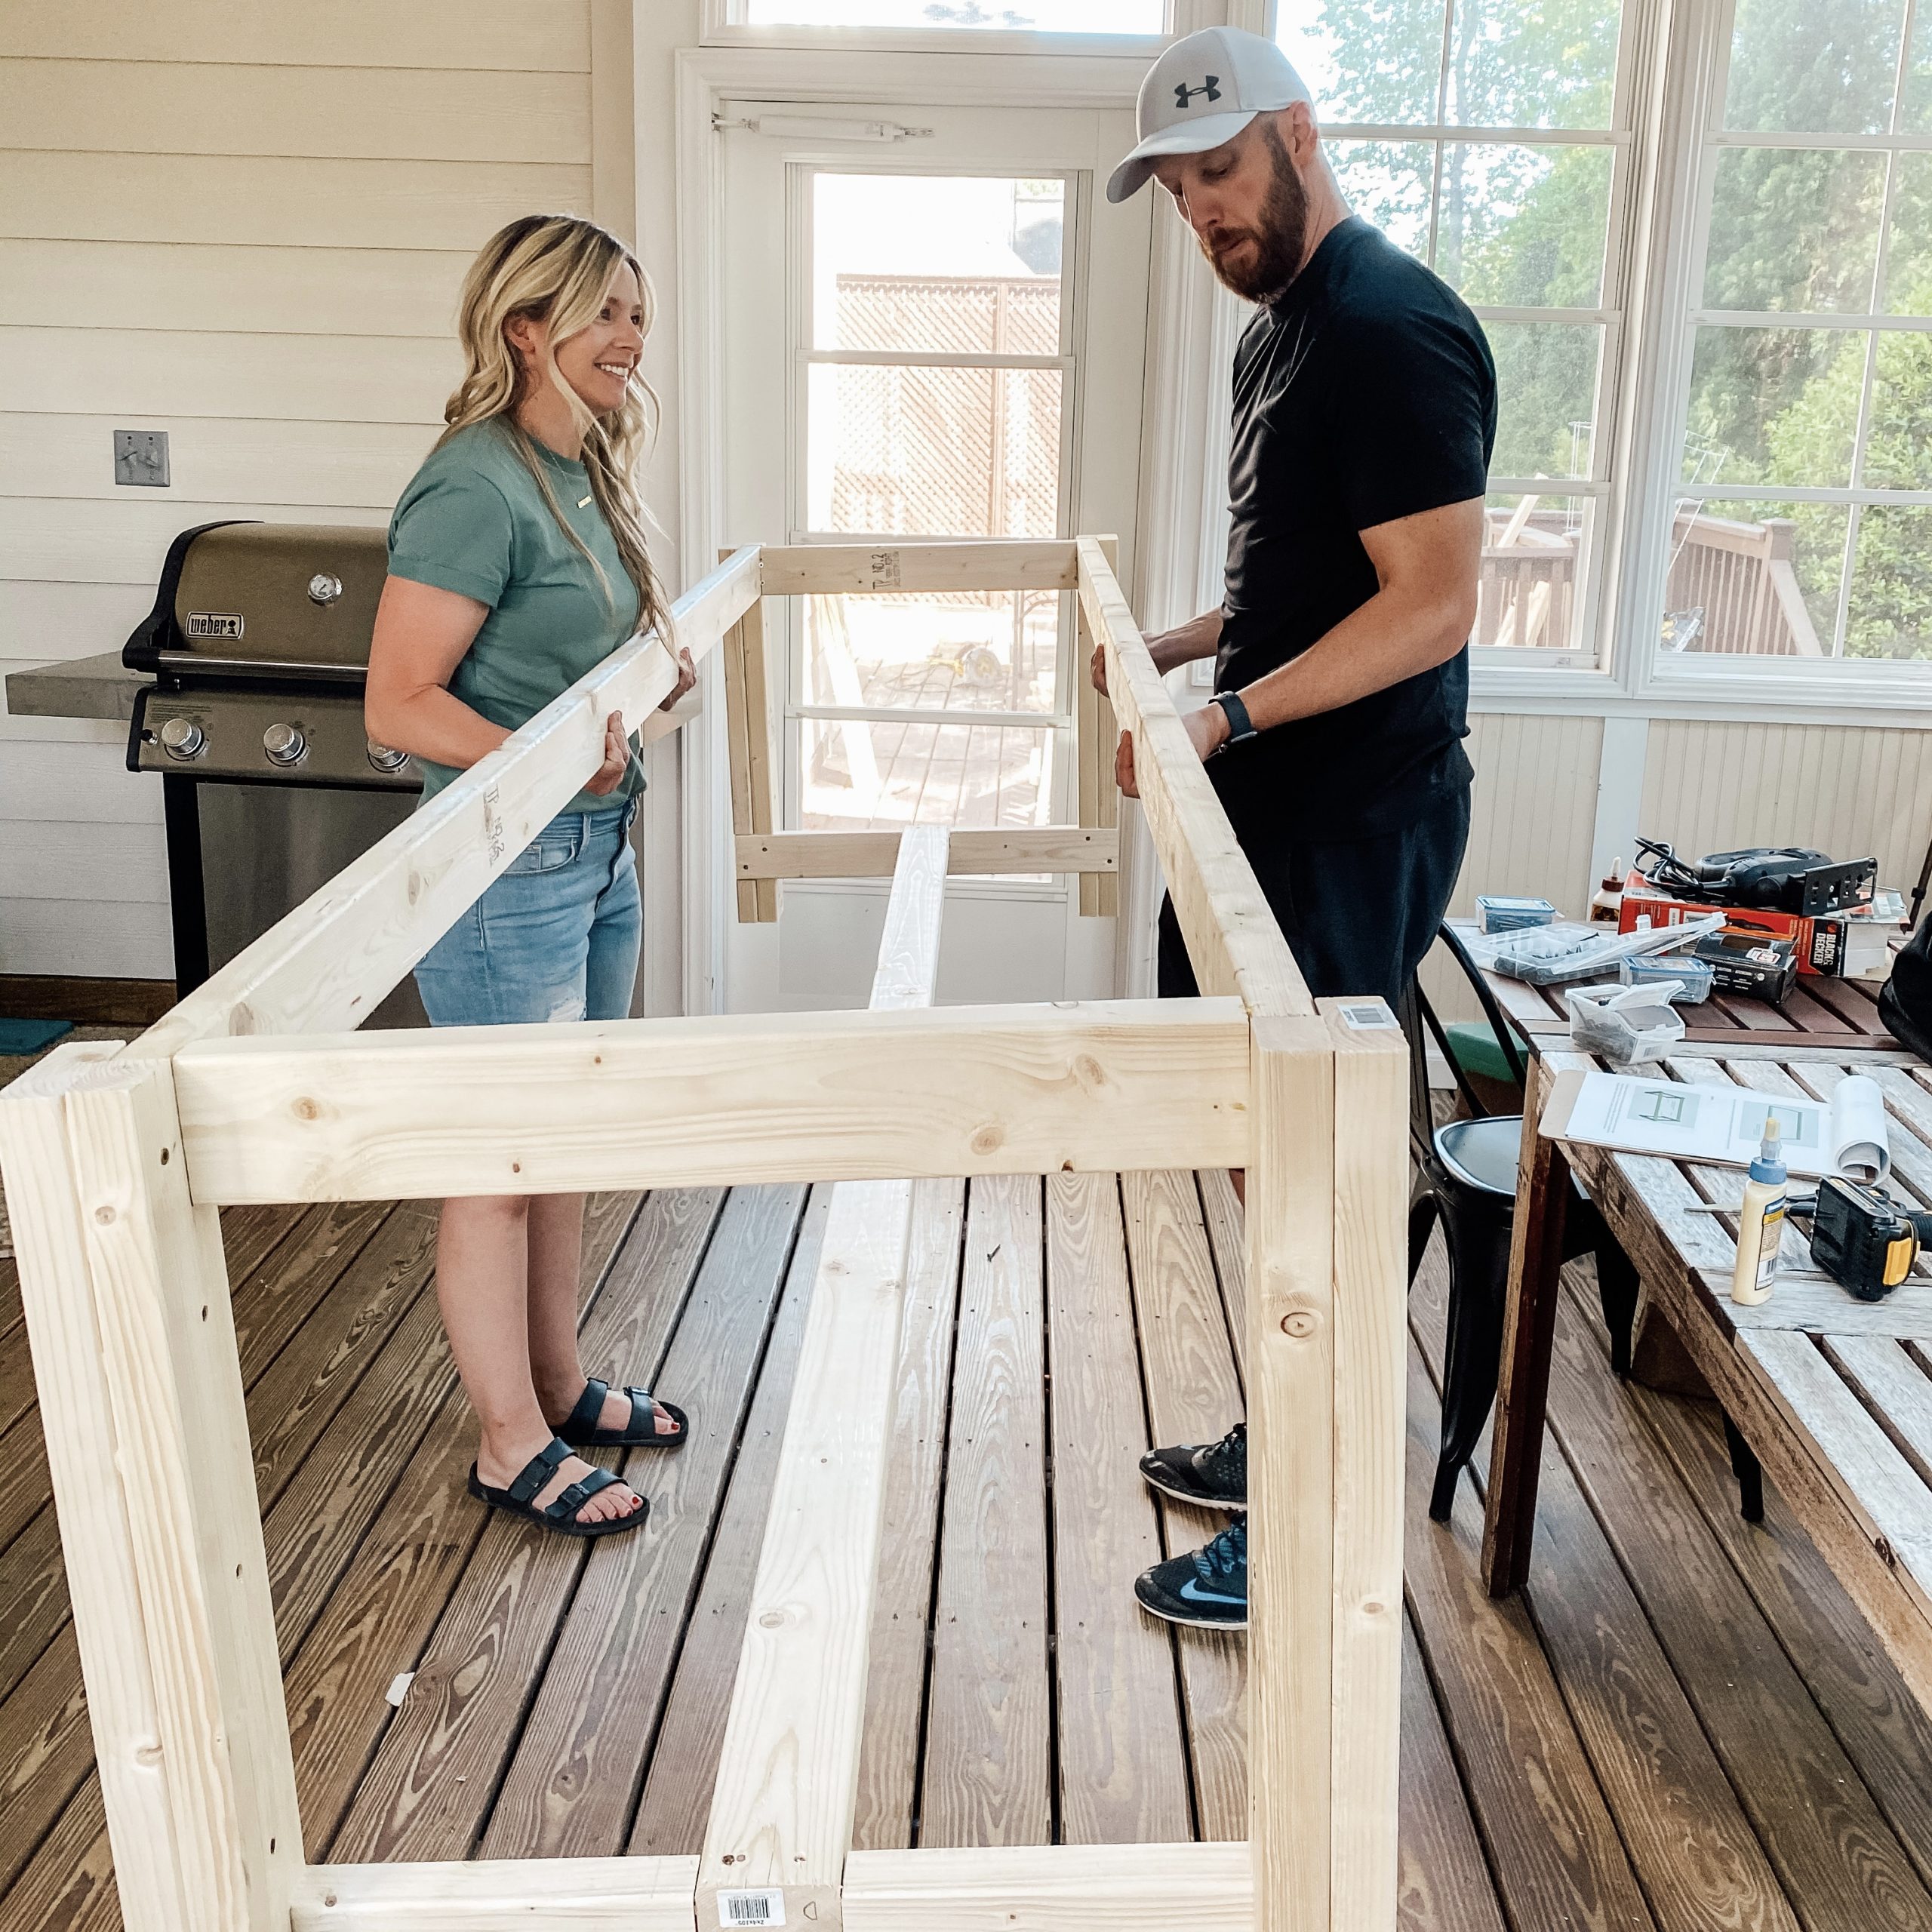
4. Build the Patio Table Base
With all of the wood cut and notched, it's time to build the table base using wood glue and screws. We were worried that our measurements might be off and the table frame wouldn't fit together as it should. But we went for it and were pleasantly surprised that it fit perfectly!
5. Build the Patio Table Top
The table top requires horizontal support braces. Once those are installed, you can put together the vertical boards—and it really starts looking like a table!
The plans recommended screwing in the vertical boards through the top, but we decided to flip the table over and drill through the bottom so we didn't have as many visible nail holes.
6. Sand the Wood
The table is finally built! Now you just need to sand and stain the wood and you'll be done. During this step we discovered that our table doesn't quite fit through the door—whoops! We thought we'd have to take off the door to get it out, but eventually we realized we could turn it on its side and get it out the door so we could sand outside.
Before sanding you'll want to go around with stainable wood filler to fill any nail holes or cracks. We definitely had a few gaps that needed to be filled—but we knew from the start that this would be a rustic table. We did our best, and are still so happy with the results!
They didn't have 120-grit sandpaper at the hardware store, so we started out with 100-grit and then moved onto 220-grit to get a smooth finish. It took a long time to sand with 120-grit paper, and I really had to work to get some of the ink off the wood. But in the end it looked beautiful!
Another tip: We put a cloth over our plants so they didn't get covered in sandpaper. (Justin is great about keeping out plants alive!)

7. Stain the Wood
I decided to take a scrap piece of wood to try out a couple different stains before applying it to the whole table. I also tried a water-based polyurethane on the natural wood because I thought it might be pretty on its own. (Oil-based polyurethane yellows over time, so I try to avoid it, even though it tends to be more durable than water-based.)
Ultimately, I decided that the natural wood with polyurethane looked too unfinished. We went with the flagstone stain, starting with the underside and then moving to the top. Staining can be scary—I loved the table so much at this point and we had worked so hard on it. We were crossing our fingers we would like the stain.
We also took a paint brush to the cracks because there were some parts where the rag couldn't get in to distribute the stain. Then we let it fully dry, put a couple coats of polyurethane on it, and let it dry overnight.

Final Thoughts on Our Outdoor Patio Table
I love the end results of our outdoor patio table! It is super heavy-duty and I'm so excited that we can easily seat 12 people around this table.
We also ordered some awesome indoor/outdoor chairs for about $25 each. I love that they're narrow enough to squeeze more into each side of the table, while still being comfortable to sit on for long periods of time.

Ana White is the true genius behind these plans—we couldn't have done it without her farmhouse table guide! We modified the plans slightly and are really happy with how it turned out. We'll be enjoying it for family gatherings and parties for years to come!
I like to hang out on Instagram and share more in-depth tutorials on everything I make, create, and organize. Come be a part of our Home & Kind Instagram community.


