

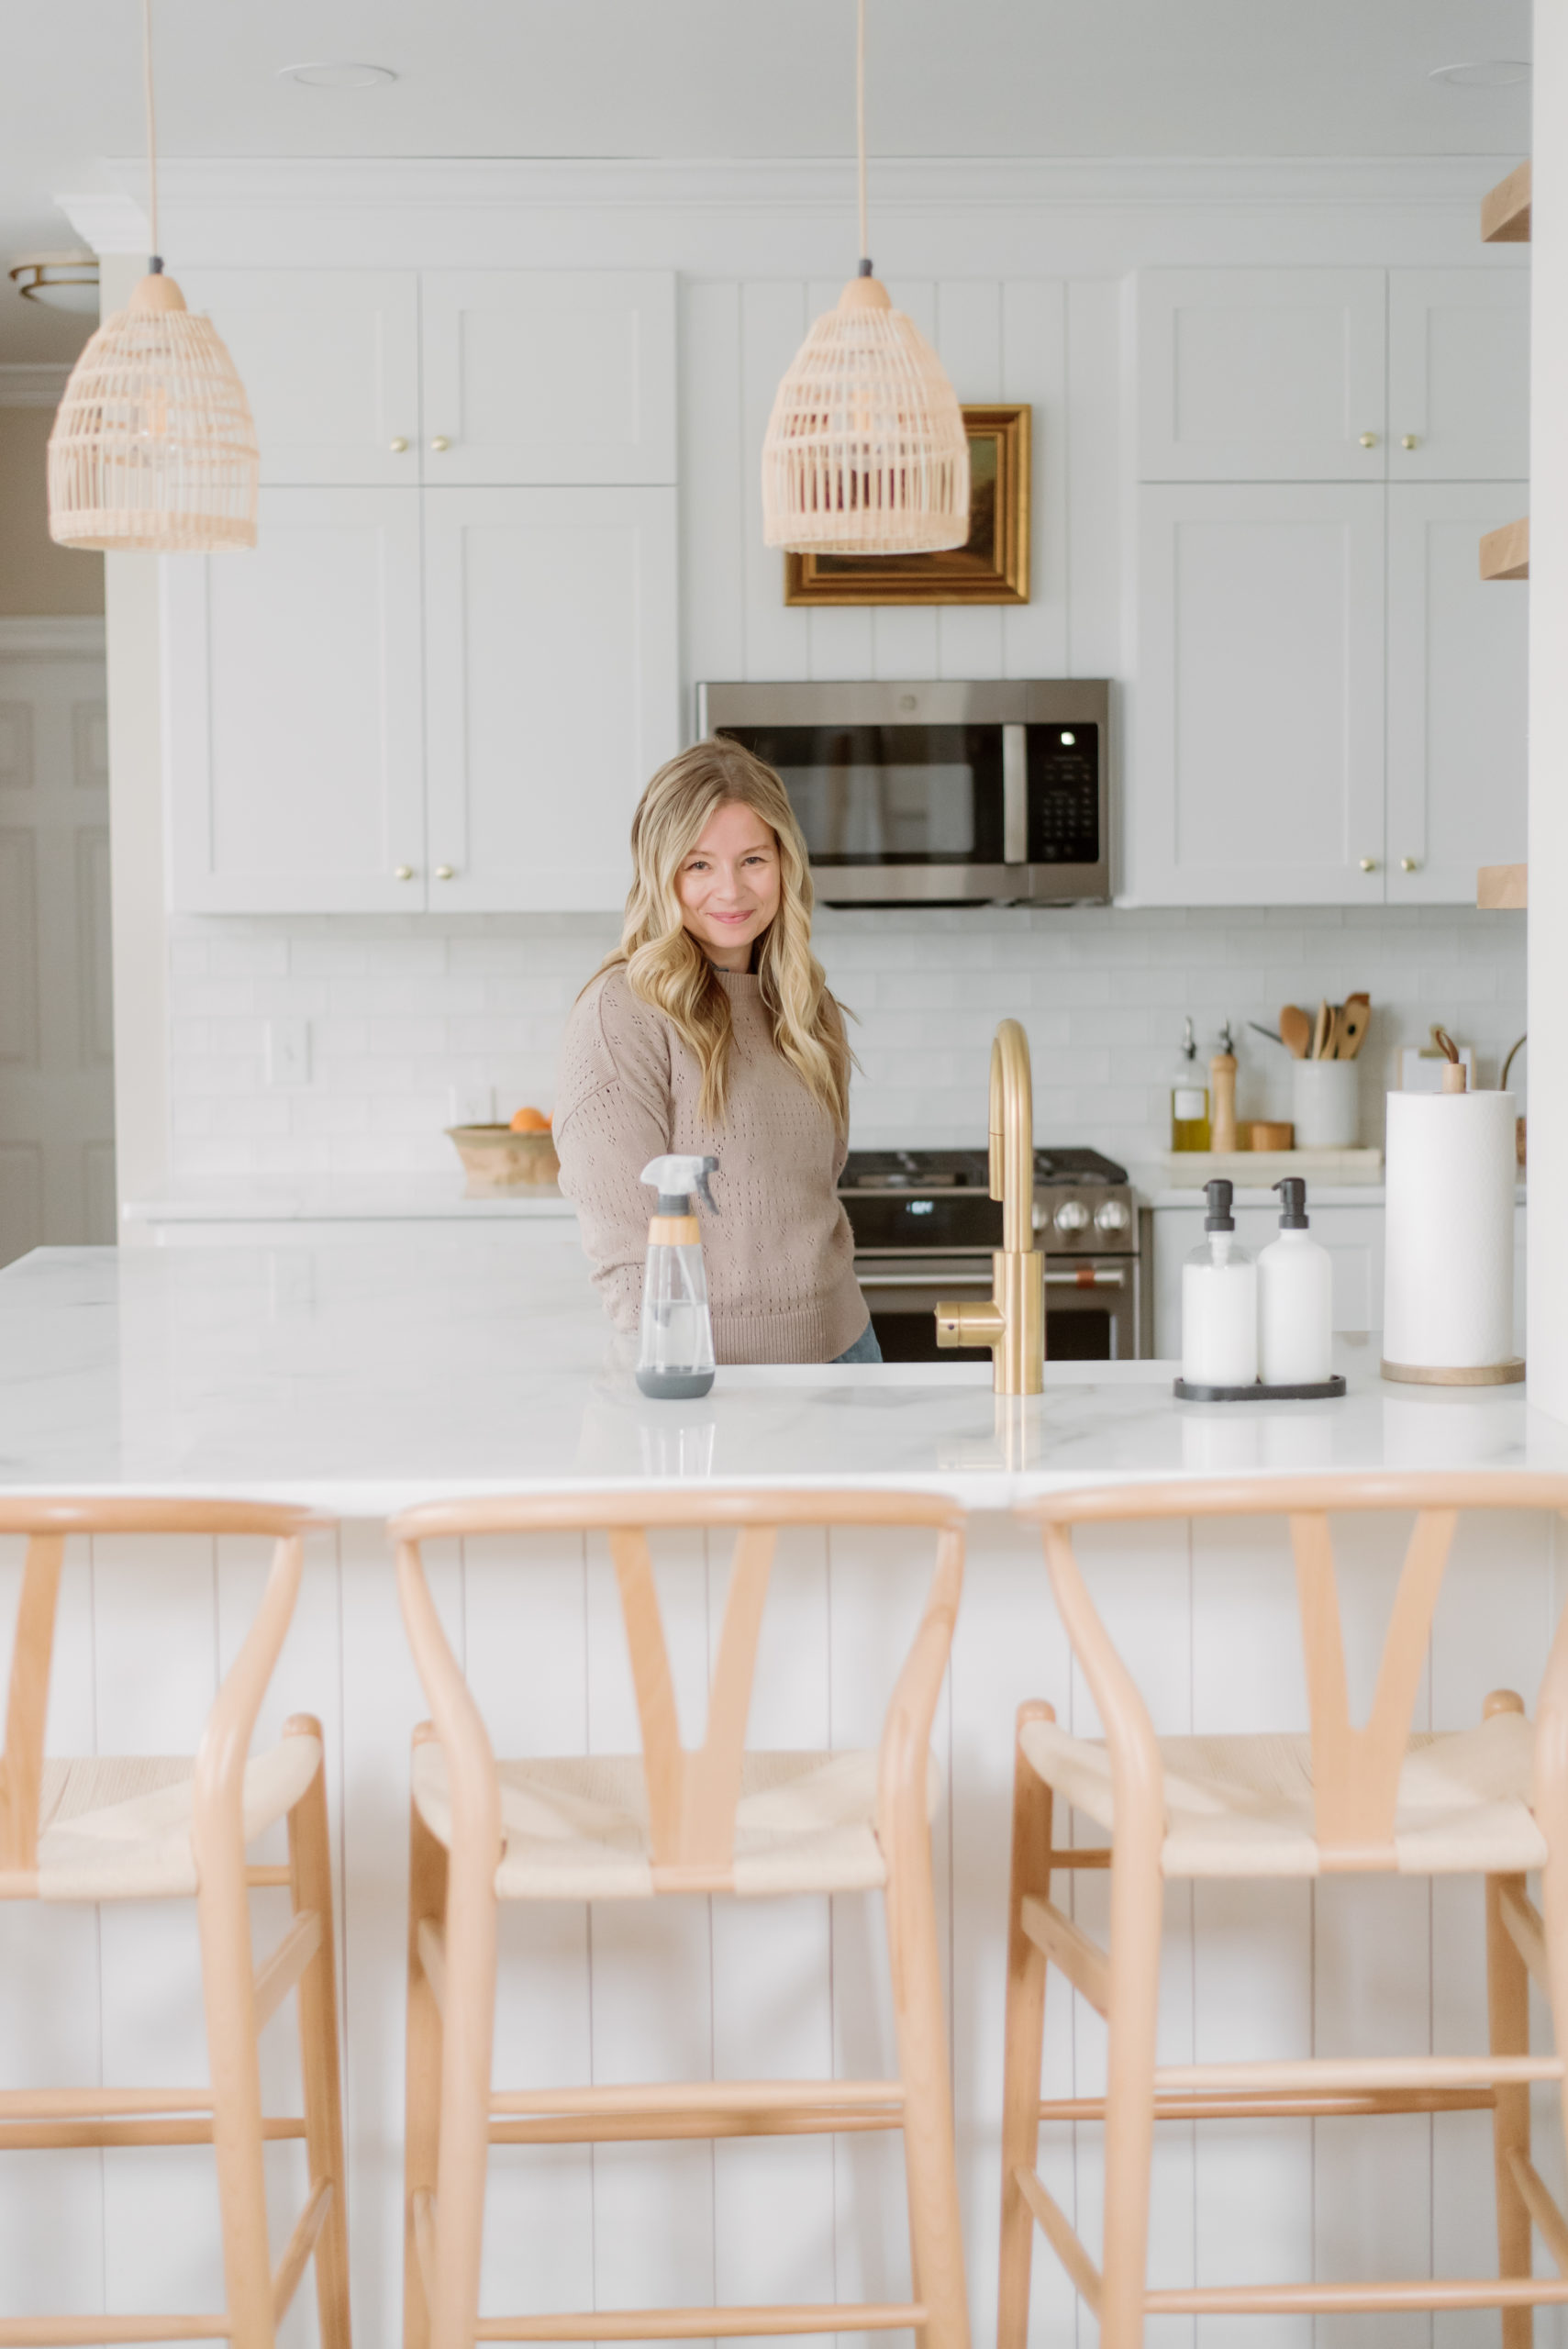
Today's the big day! I'm finally sharing our official IKEA + Nieu kitchen reveal. This post has been a LONG time coming, and it took us many long nights and days to get to this point.
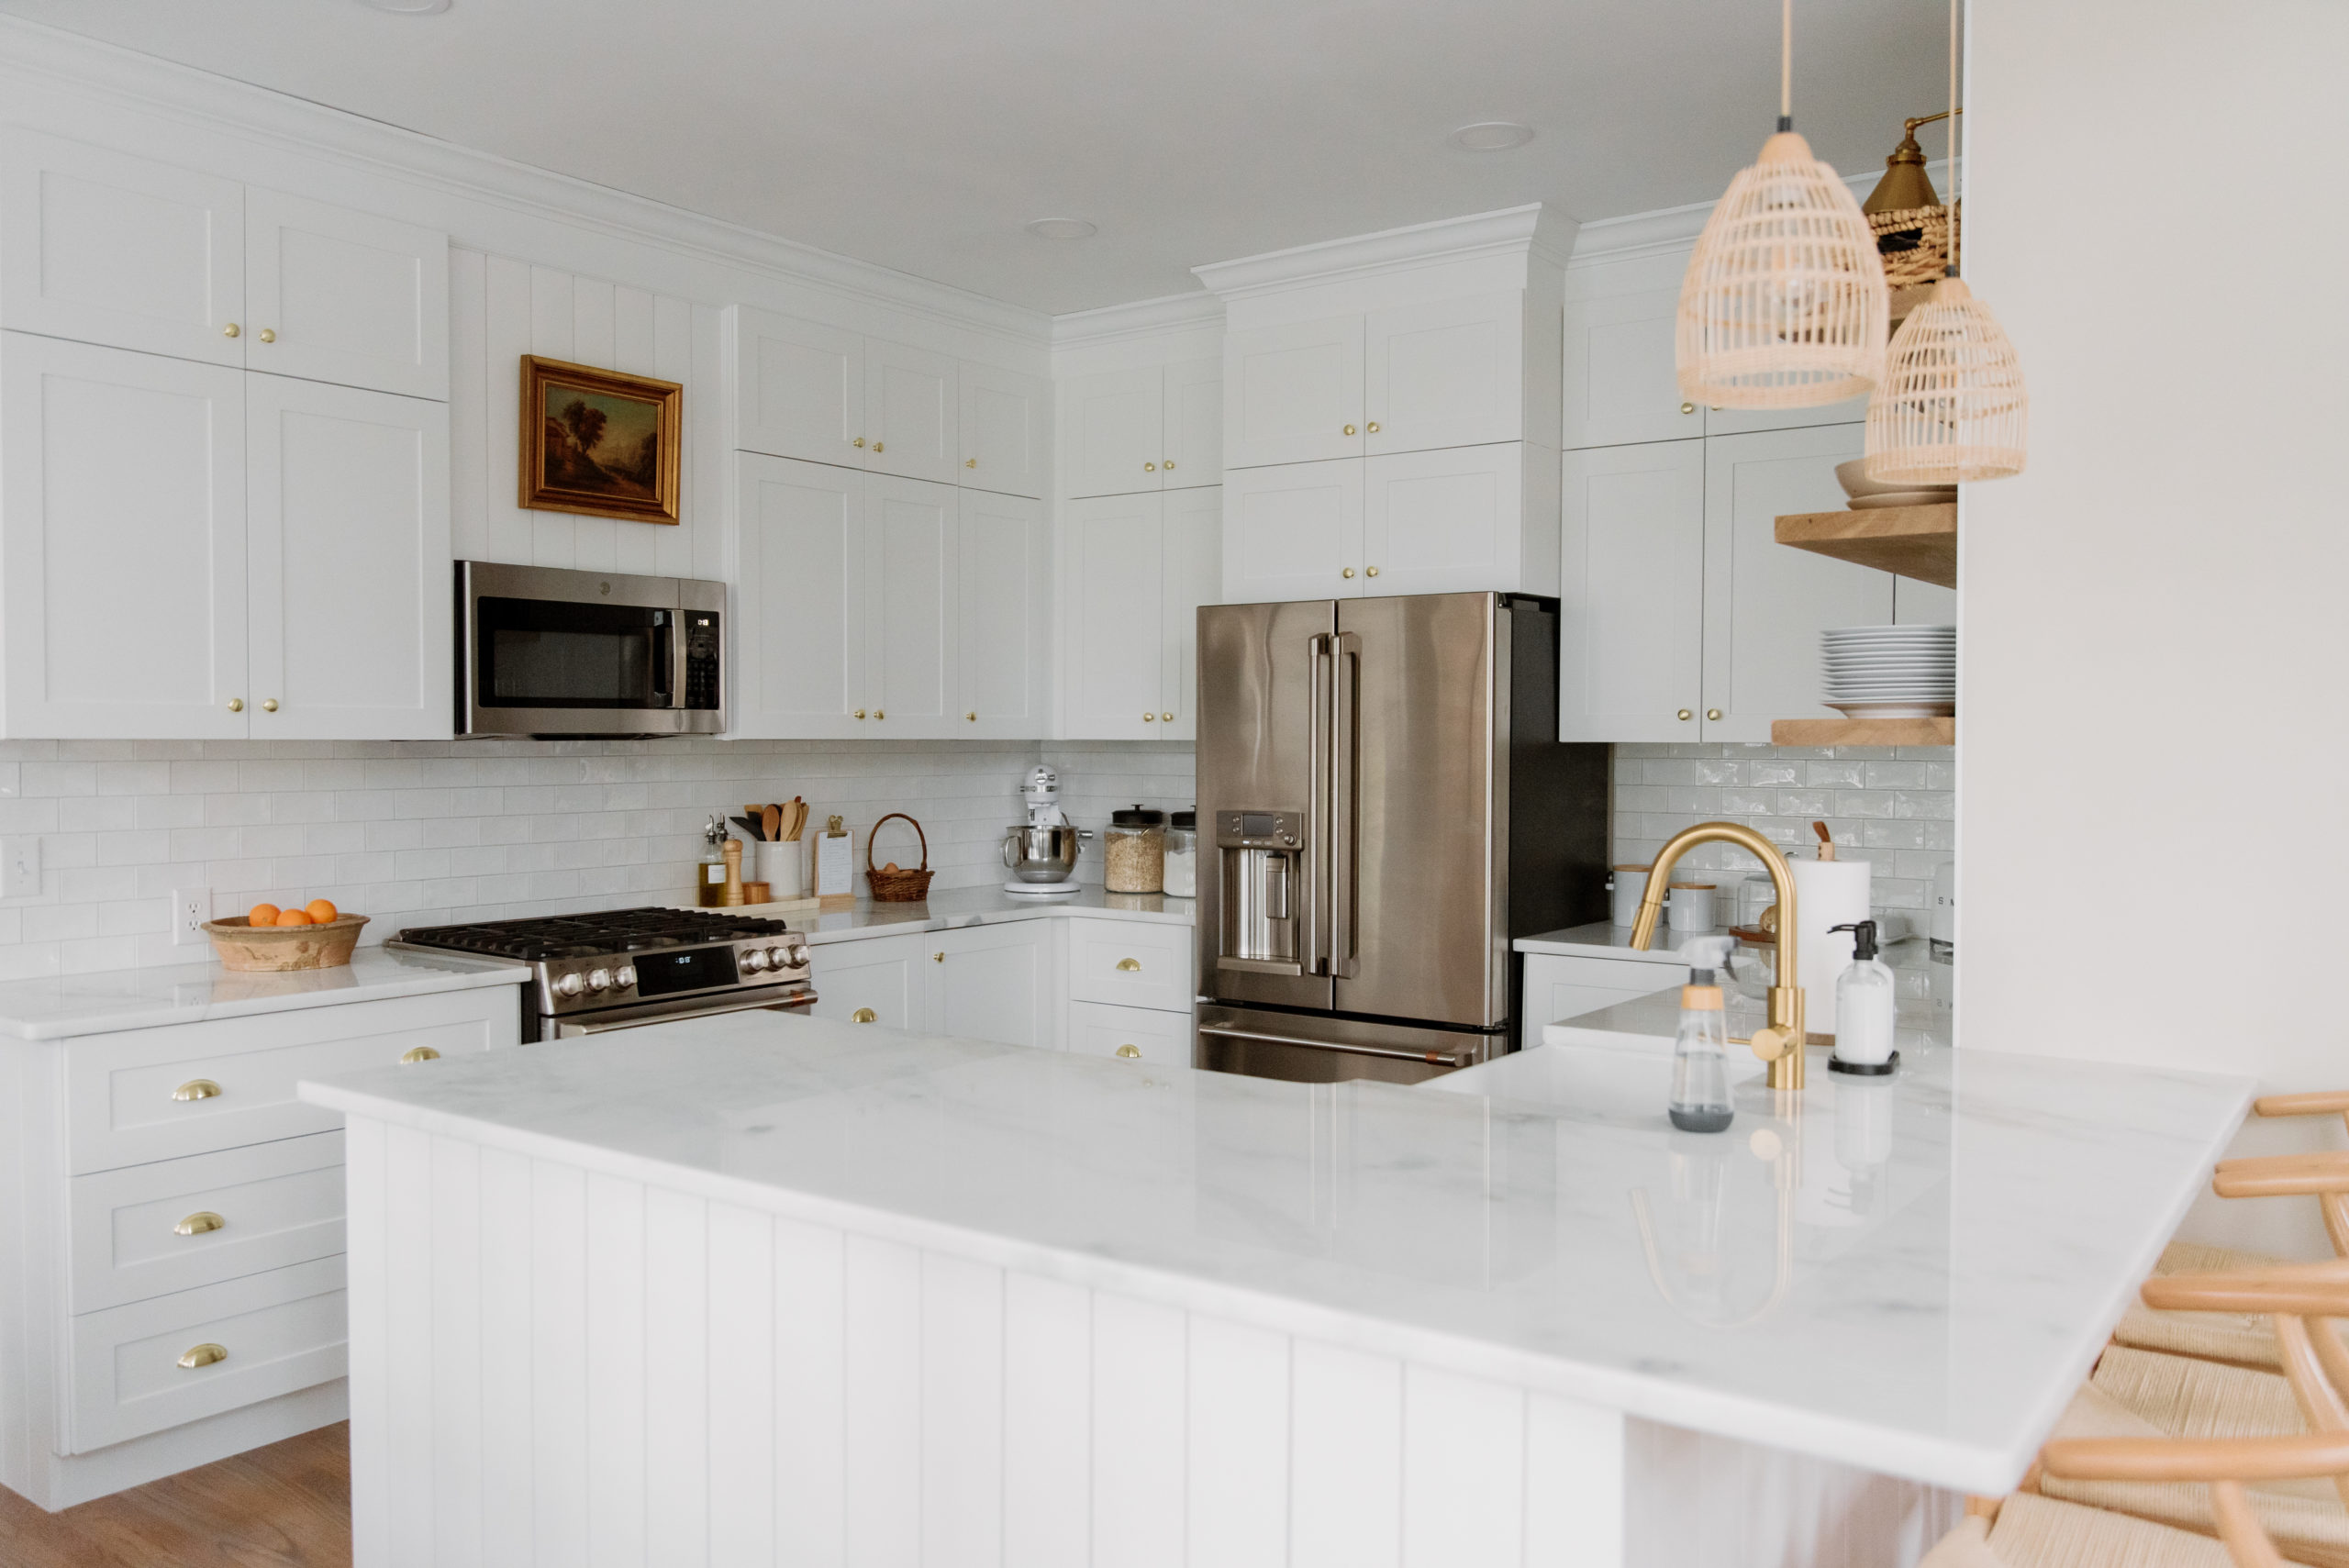
Our DIY kitchen renovation was truly a labor of love, but SO worth it in the end. I spend so much of my time in the kitchen and it is the literal center of our home. I'm so glad we were able to create a space that's bright and fresh but also warm and homey. It's a place I absolutely LOVE to be!
Our Kitchen: Before

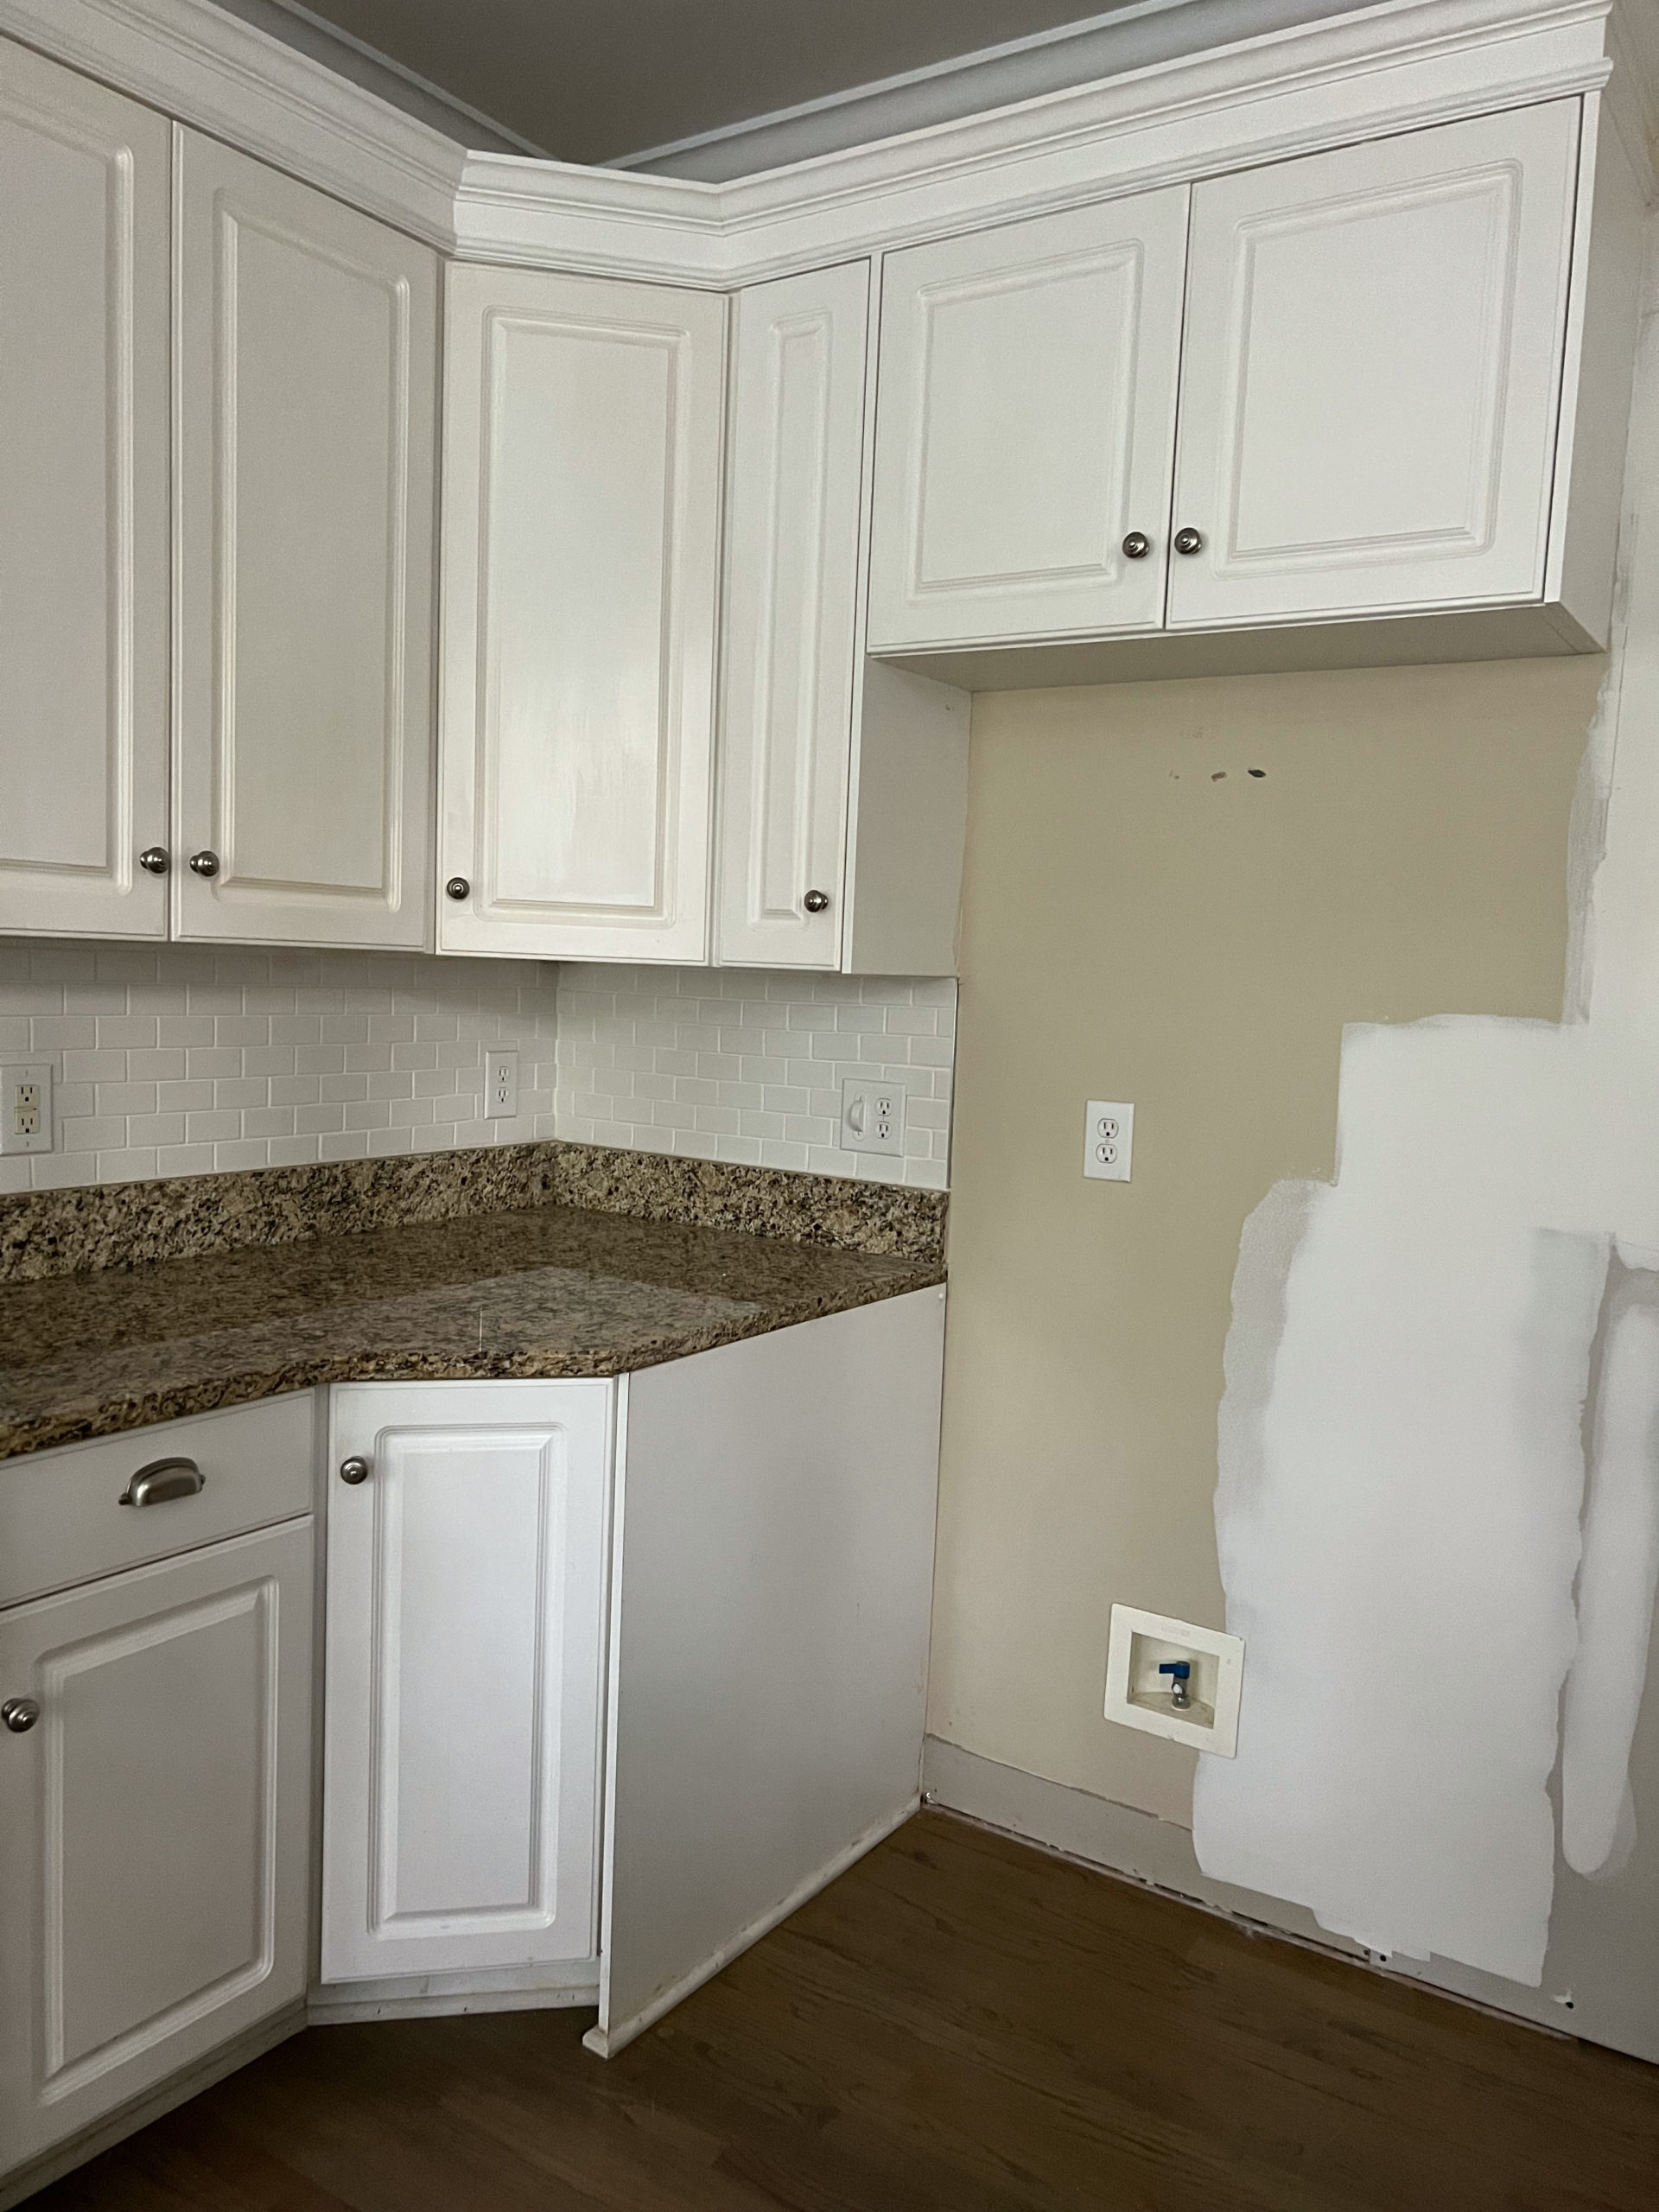
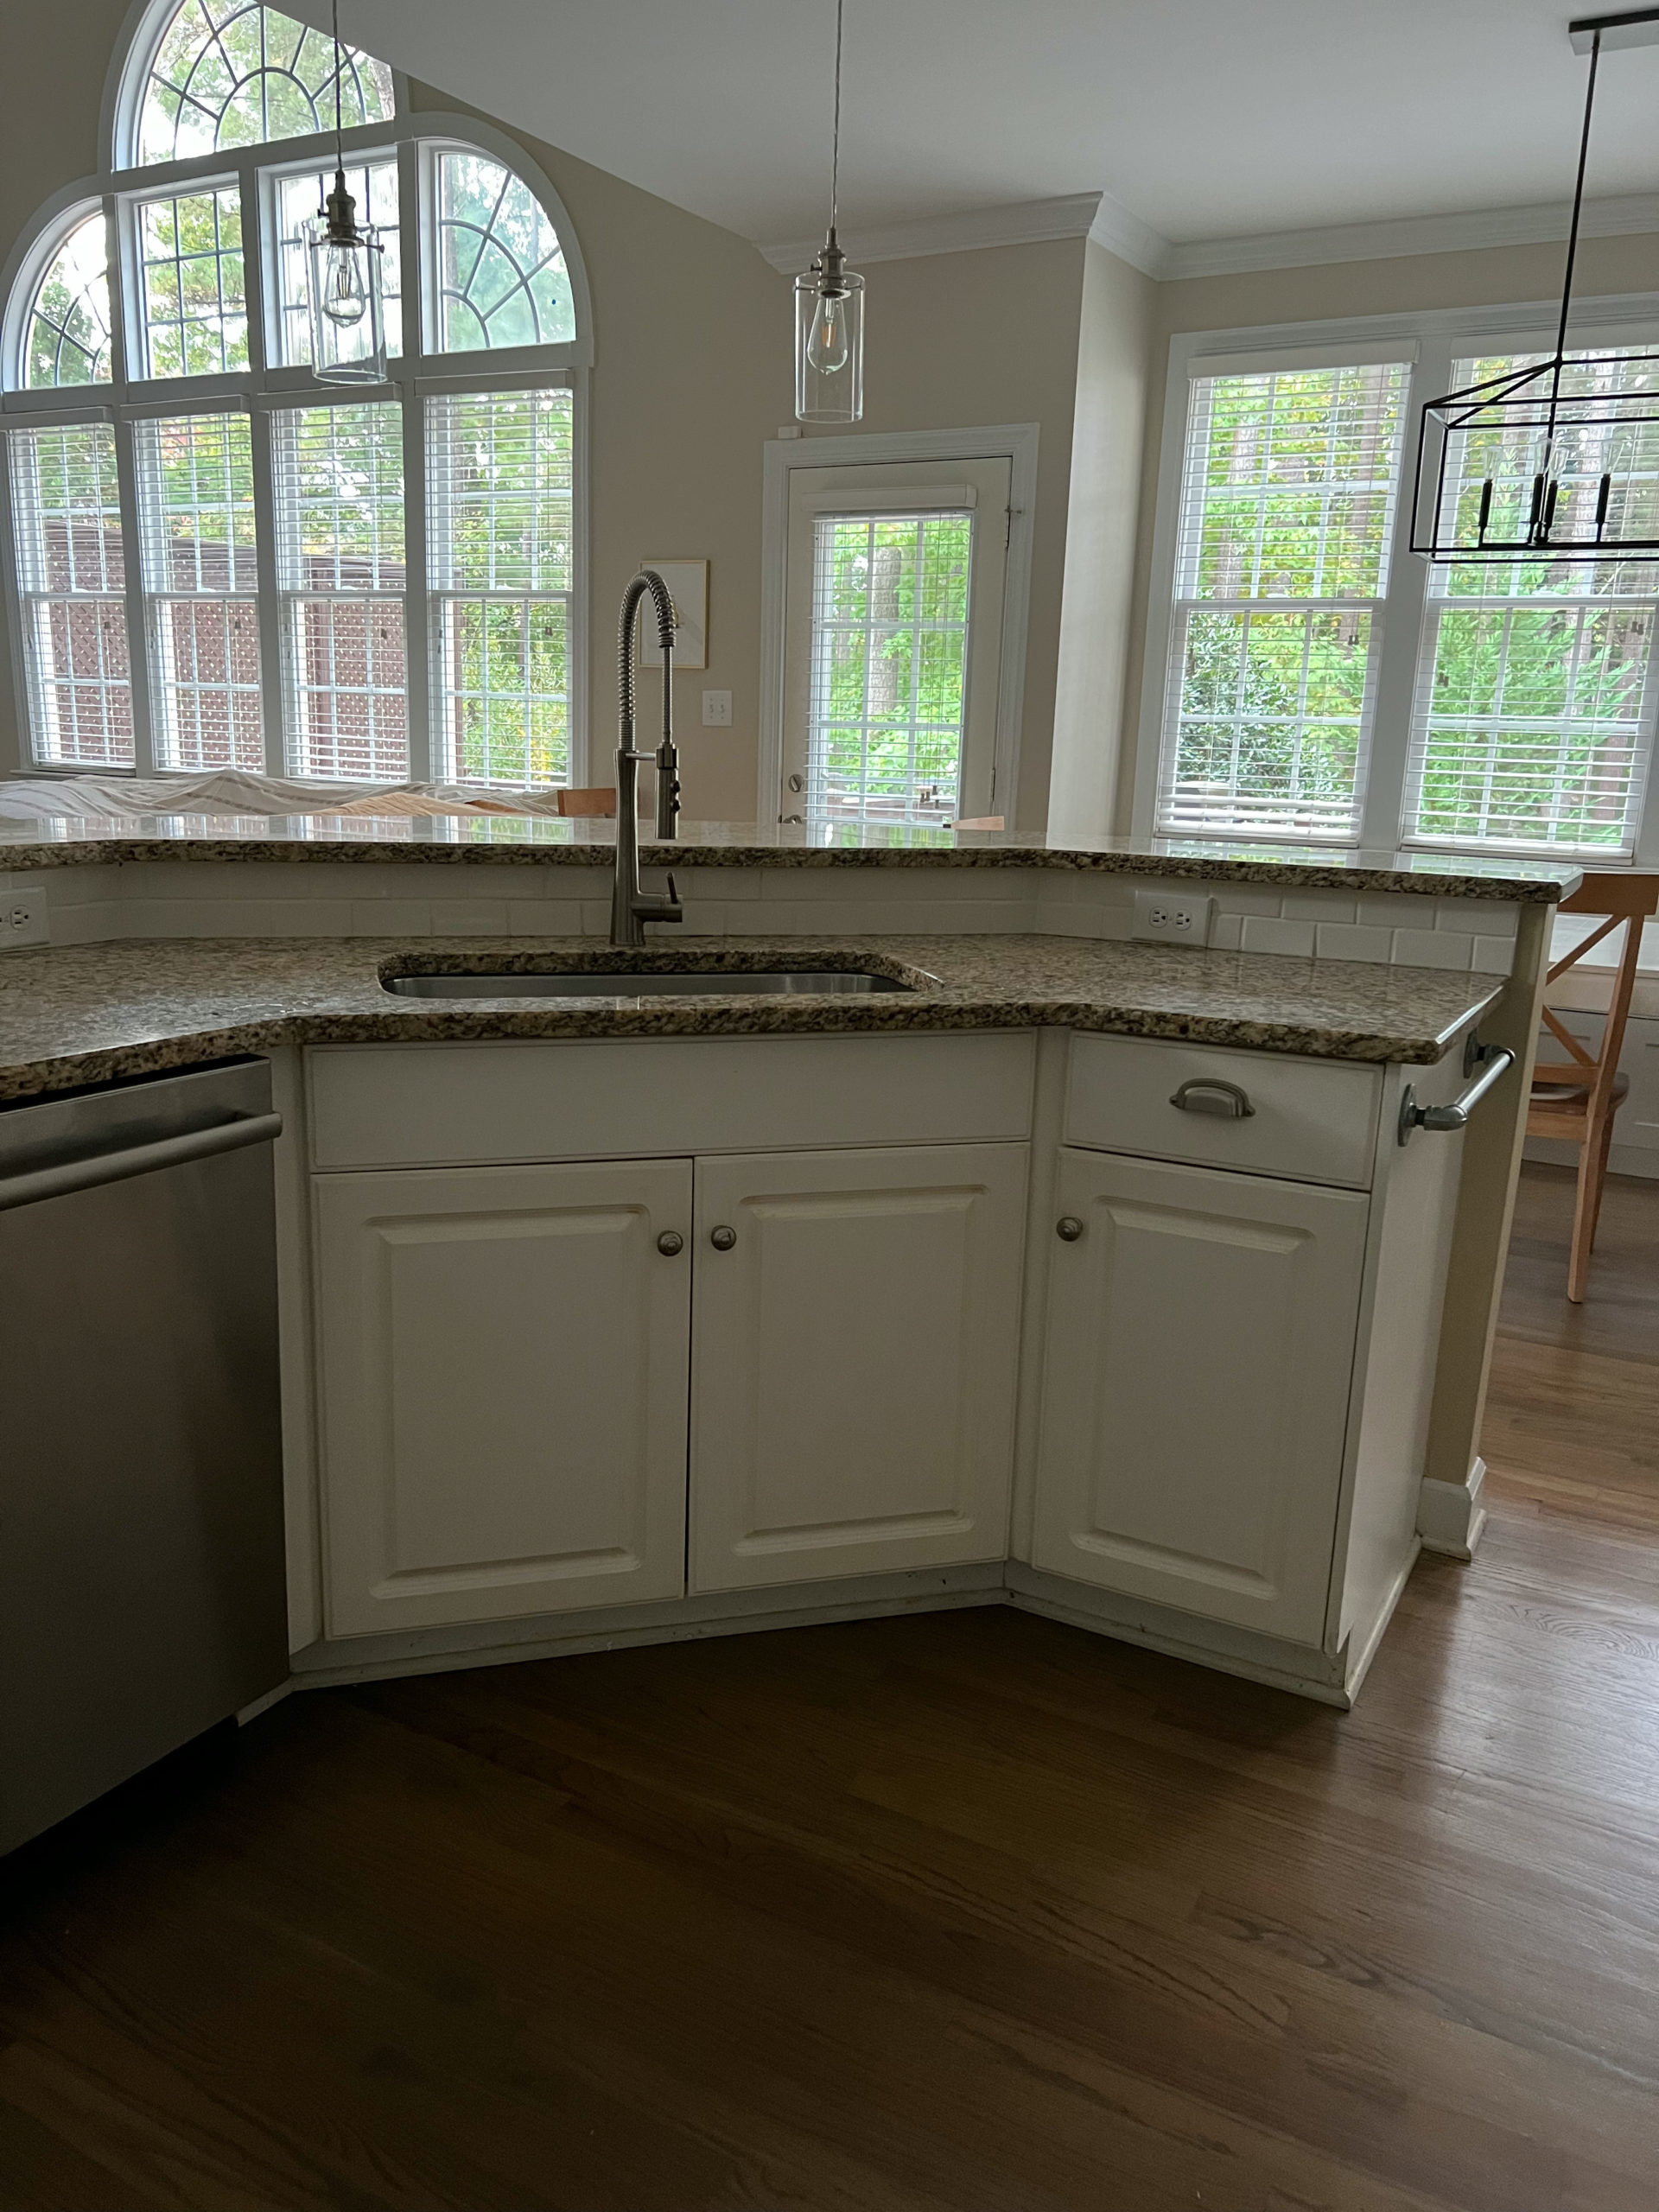
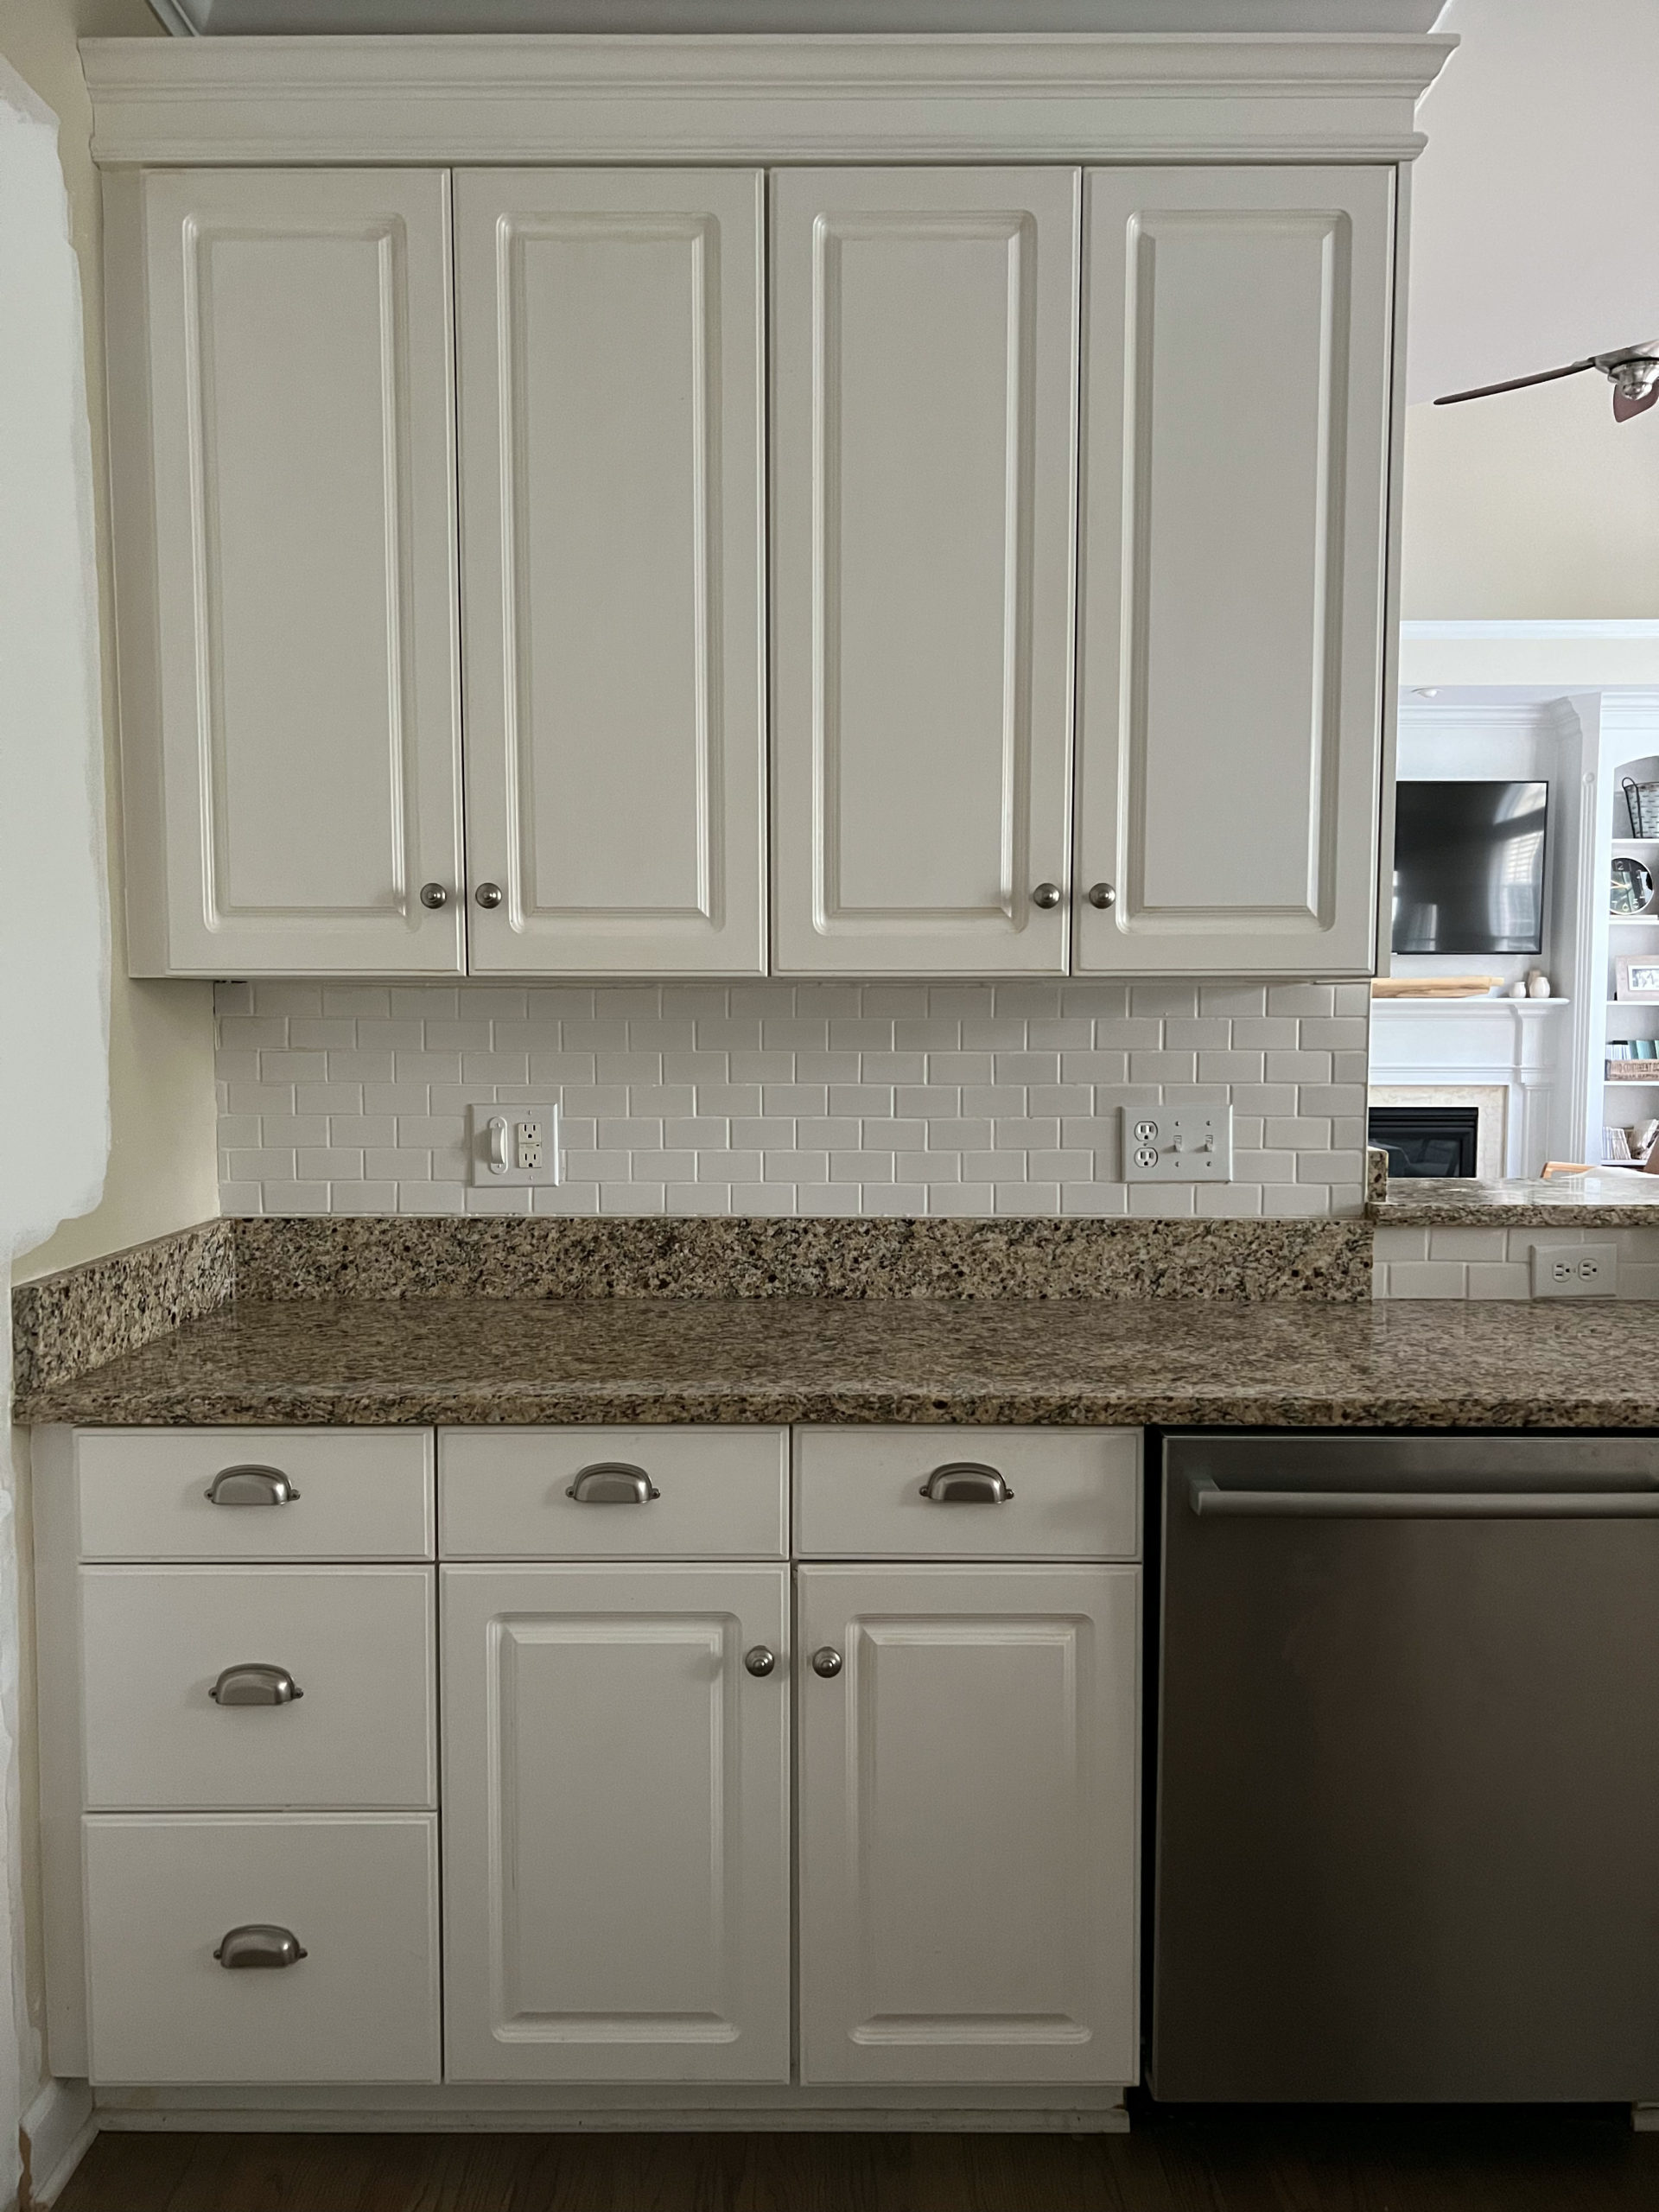
We've had plans to renovate our kitchen for quite a while. I was eager to square off our peninsula, update appliances and countertops, and make the space a little more functional for our family. But when we got a quote that was $100k+, we knew we wanted to take a different (more affordable!) route.
By using IKEA cabinets and doing a lot of the work ourselves, we were able to cut our total costs by more than half! We chose budget-friendly options for many finishes, but still got to splurge a little bit on the things that were most important to us (like quality appliances). It was the perfect option for us and saved us SO much money!
Of course, there were a few things we didn't even want to attempt on our own, such as plumping, gas lines, and electric work. We hired a contractor to handle those types of jobs—and still came out saving a ton.
Renovation Sources + Cost Breakdown
I'm breaking down each of the sources by category, including cabinets, appliances, lighting, and more. I also created a category for contractor costs, since this was a big (and crucial) part of the budget!
Cabinets
Going the DIY route with IKEA cabinetry can seem a little intimidating. But hear me out! If you can put together regular IKEA furniture, you can definitely put together IKEA cabinets. It was actually a really simple process, and the latest version of the IKEA kitchen planner is even better than the one I used.
The trickiest part was the 6-month wait for the particular cabinet boxes we wanted. Other than that, the whole thing was pretty seamless. Just make sure you get really accurate measurements, and IKEA will help you with the rest!
We also used Nieu cabinet fronts for a more elevated look. We sent them our IKEA plans and they were able to perfectly match all the doors to the boxes. I love that Nieu uses Sherwin Williams paint colors, so we could perfectly match the cabinet fronts to the paneling we used in other parts of the kitchen. I absolutely love this company and highly recommend them to anyone considering an IKEA kitchen! The doors came labeled and pre-drilled for the hinges and drawer hardware so they were super easy to install.
- IKEA Sektion cabinet boxes: $5,140.39
- Nieu cabinet fronts: $6,933.98
- Pulls: $65.96
- Knobs: $74.35
Appliances
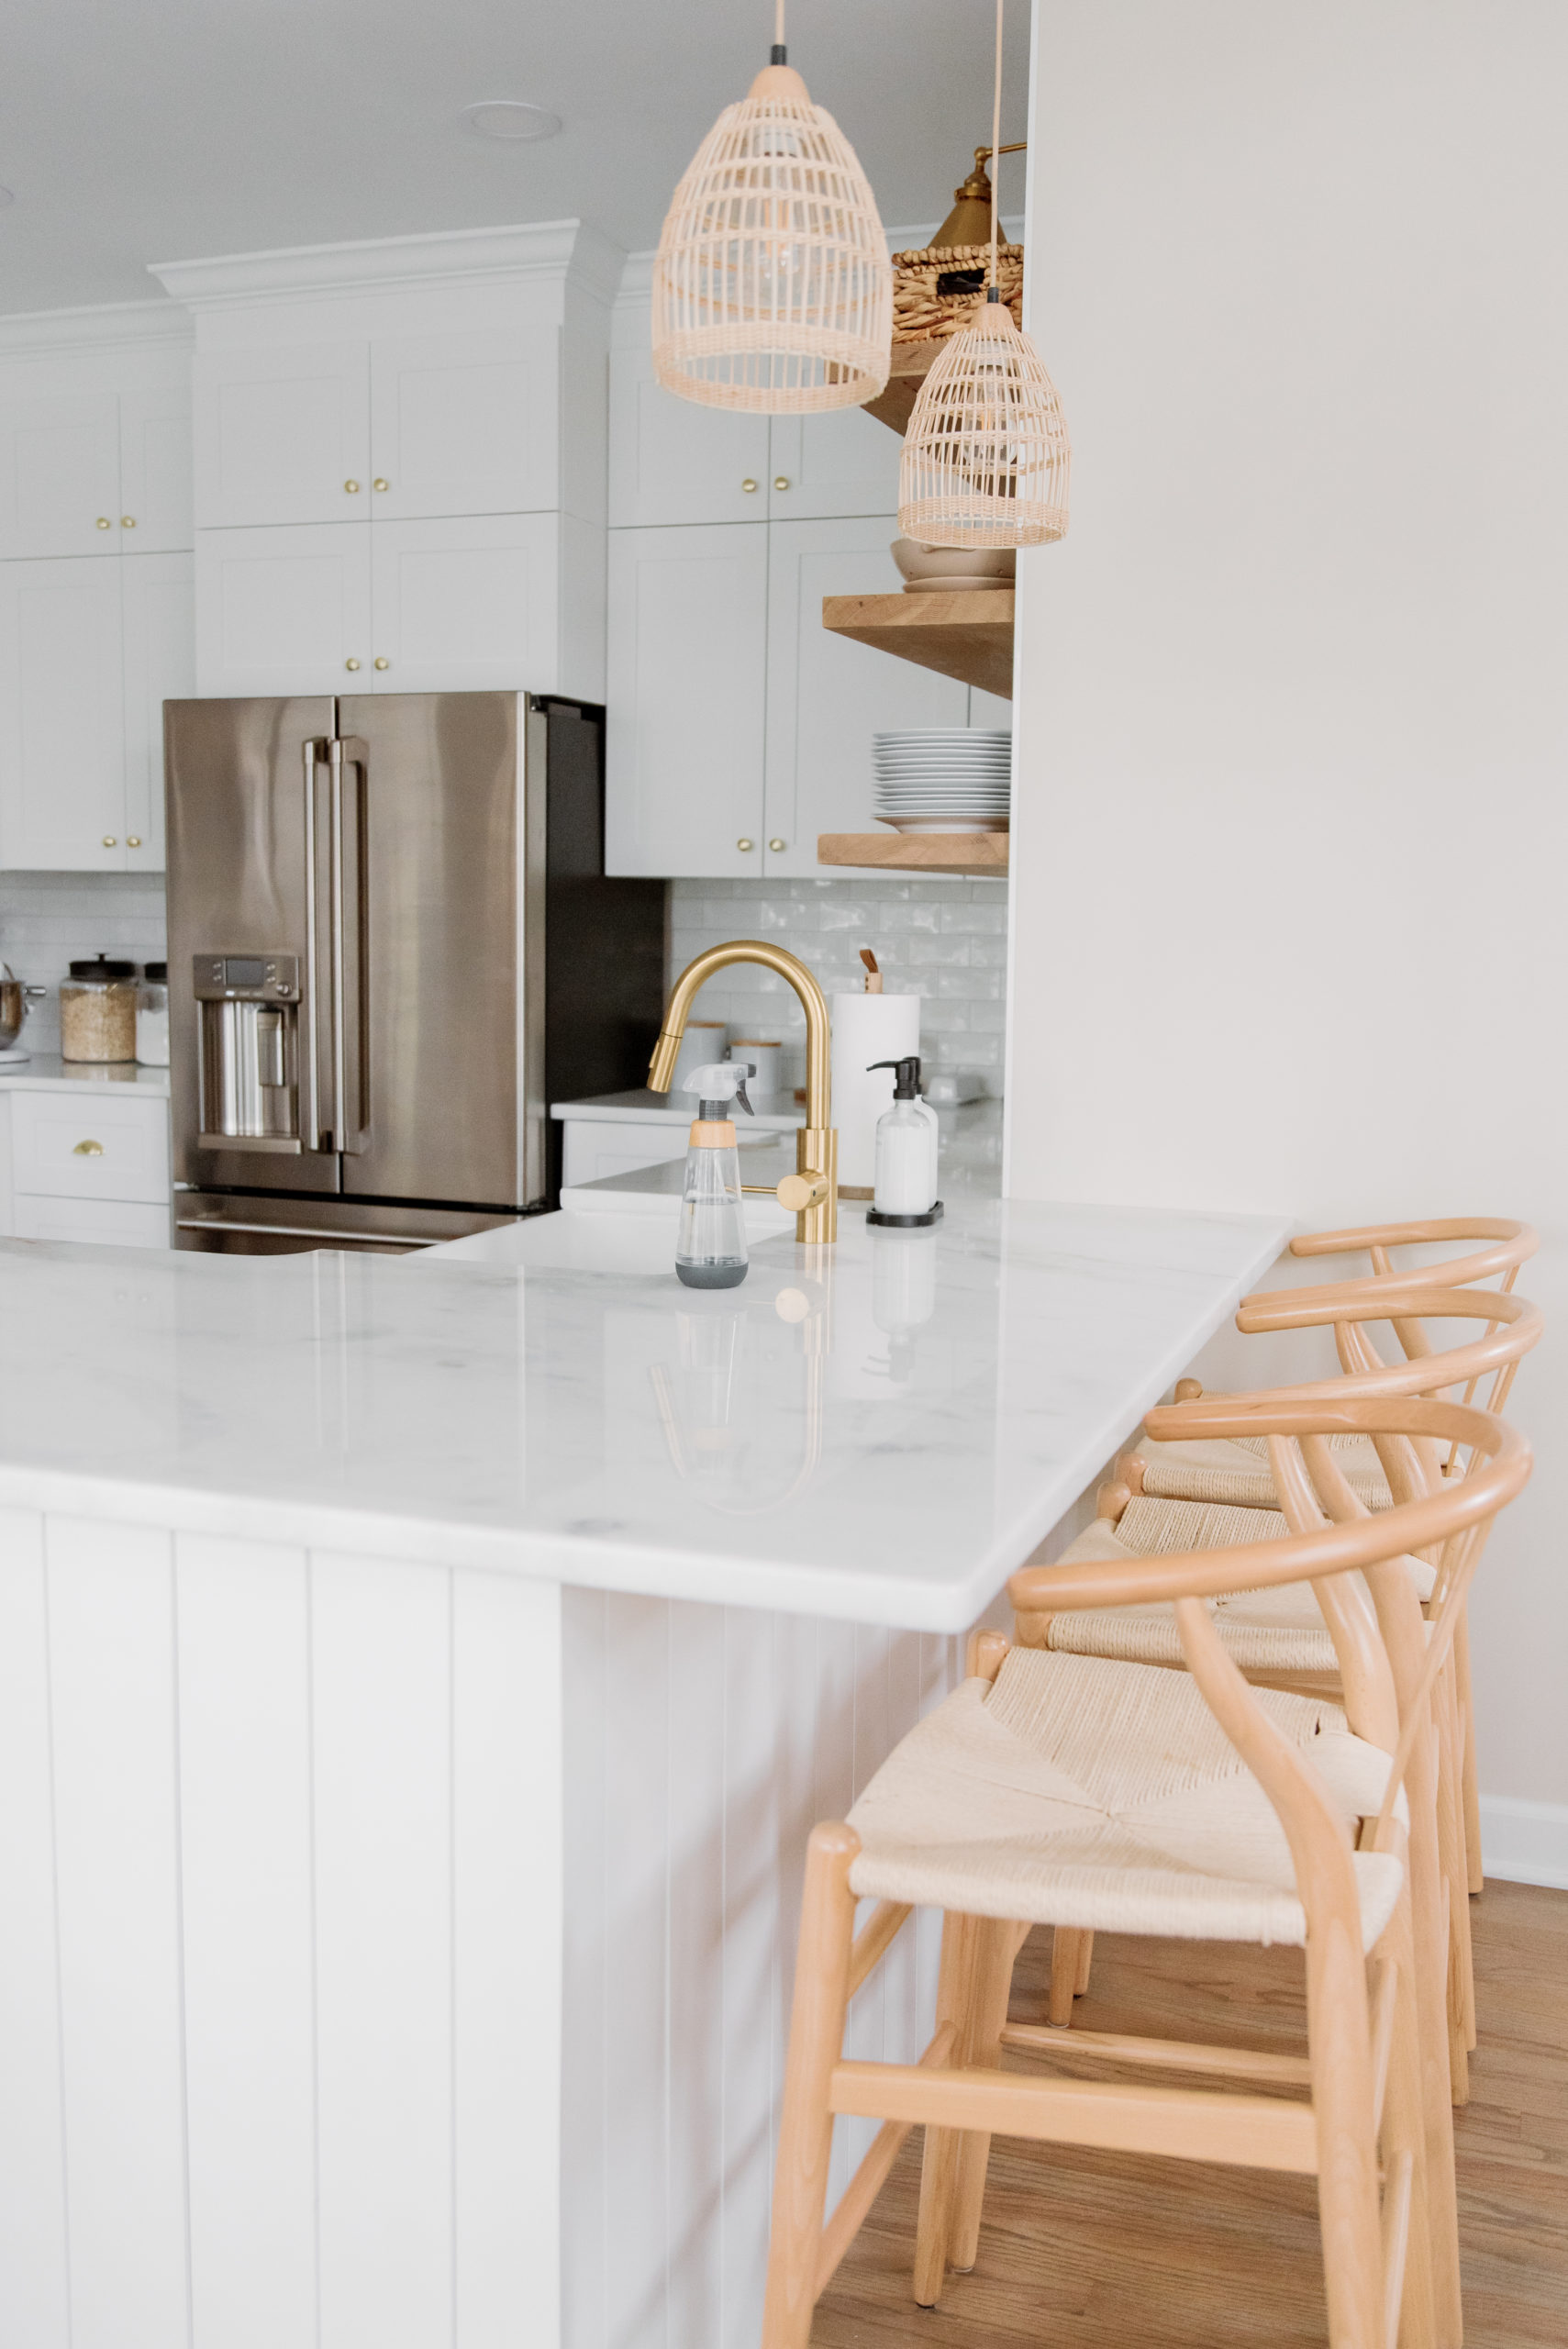
We decided to invest a bit more in our appliances, and I don't regret this decision one bit! Our fridge is amazing—it's counter-depth but has plenty of space, and it even makes HOT water! (My favorite feature!)
In my experience, a gas range is is far superior to electric, but I didn't want to settle for a gas oven (which is quite finicky and inconsistent). The dual-fuel range we got features a gas cooktop and an electric double oven - the best of both worlds! Since we had an electric range before, we needed to put in a gas line to make this happen. We hired a contractor to bring gas from our fireplace to the kitchen. That definitely wasn't something we were equipped to do ourselves!
- Fridge: $3,753.56
- Gas range: $3,946.16
- Farmhouse sink: $352.85
- Faucet: $187.84
- Microwave: $369.00
- Dishwasher: $1,499.00

Backsplash
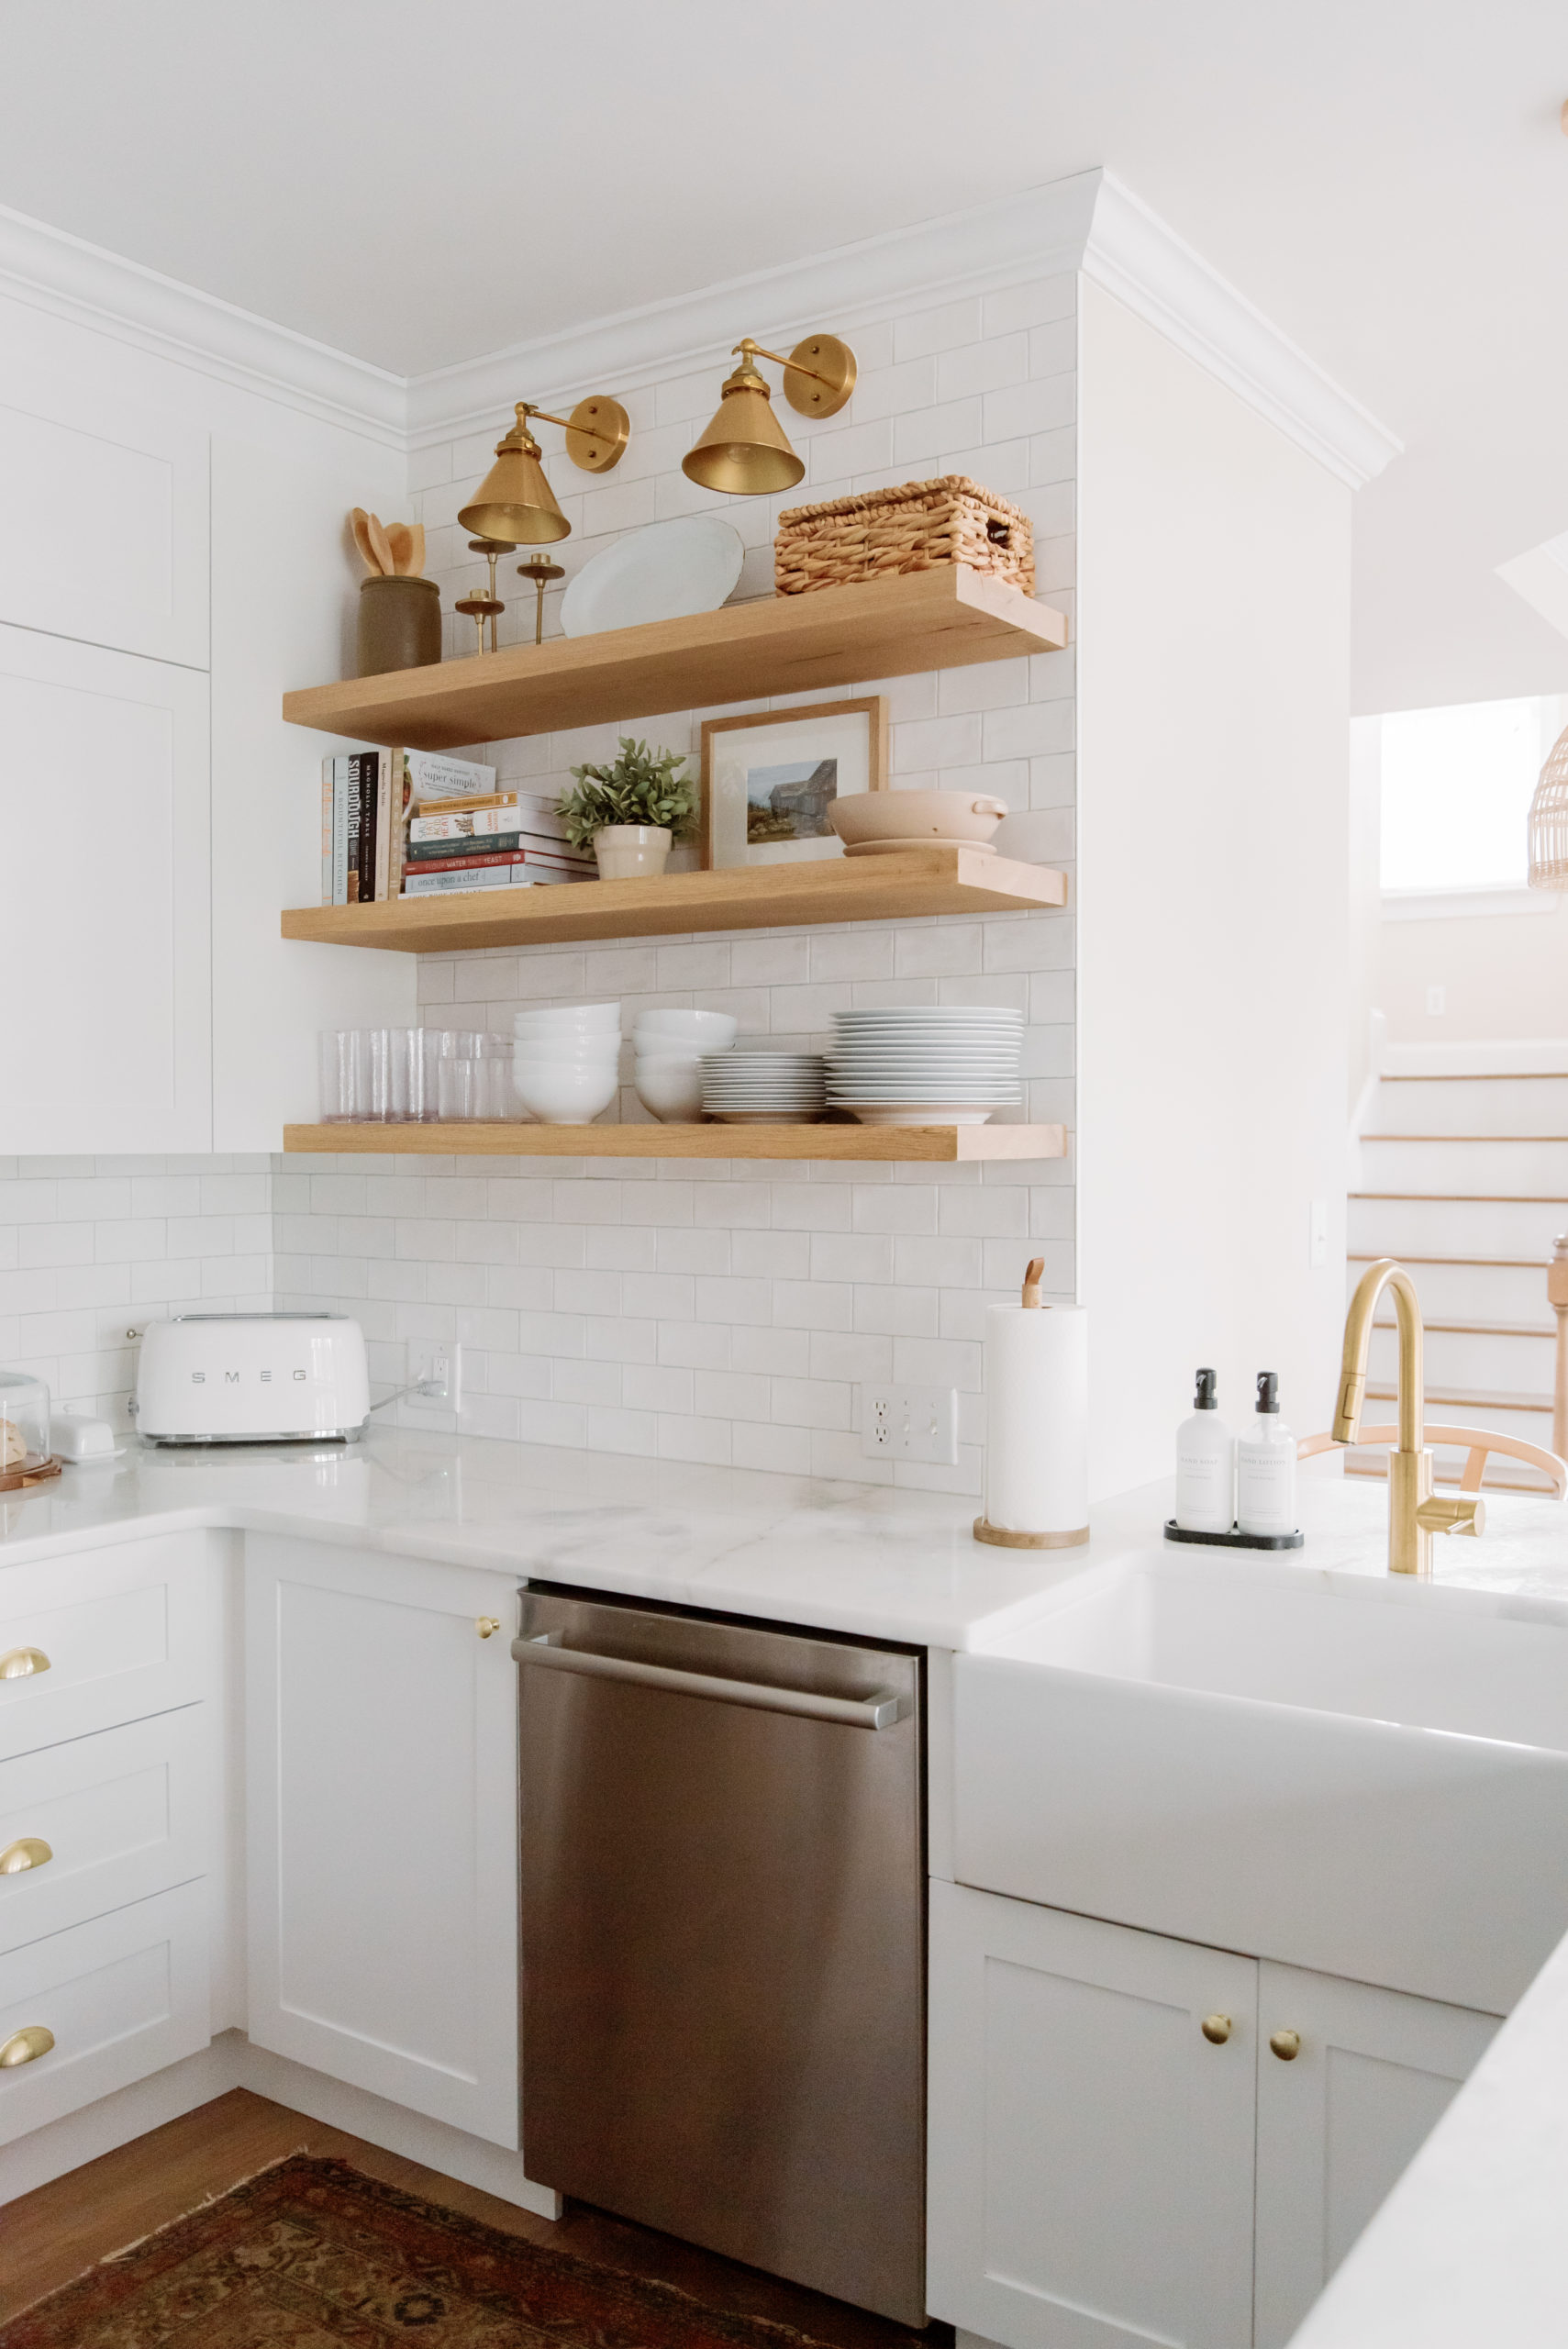
After being discouraged with backsplash options at a higher-end showroom, I ended up finding the perfect backsplash from Lowe's. I wanted to keep it simple and light but I love that these 4x6" tiles have a hand cut look so they add movement and texture to the wall. We went with a light gray grout to make the tiles pop a bit as well.
- Backsplash tile: $761.00
- Grout: $21.37
Lighting
Lighting is a critical part of any room. We subbed out our giant "boob" light in the kitchen with four recessed lights. A much better option than can lights, these ones just pop into a hole in the ceiling and you can adjust the light temperature (kelvin) easily on a switch. I set mine at 3000K for the perfect soft light that doesn't look sterile. I found affordable, but beautiful, options for the sconces over our floating shelves and the pendants hanging over the bar area. It's nice to turn off the recessed lights and let the glow of the secondary lights show off at night.
- Recessed lights: $96.47
- Scones: $60.00
- Pendants: $149.84
- Dining light fixture: $235.00

Floating Shelves
If you followed along on Instagram, you know that these floating shelves were a big headache to install. The wood was SO solid and we couldn't get a drill into them even a tiny bit! It took lots of trial and error, but we finally got the job done. And I'm SO happy with how they turned out! We didn't even need to stain them—the raw wood is just naturally beautiful. After a couple coats of a water-based polyurethane, they were ready to shine.
- Reclaimed wood: $514.80
- Floating shelf brackets: $40.35
- Drill guide for floating shelves: $28.00
- Drill bit for floating shelves: $22.00
Supplies
- Home Depot trip: wood screws, plywood, shiplap: $294.12
- Home Depot trip: shims, toggle bolts, cabinet screws, washer, etc.: $58.52
- Magnets (for panel above microwave): $9.99
Contractor/Labor
- Plumbing, flooring, electrical, drywall, lighting, etc: $15,000
- Dolomite countertops + install: $3,822
- Hardwood floor refinishing: $1,000
- Gas line plumbing for stove: $2,100
- Backsplash installation: $1,140
Total Cost: $47,676.55
Furniture + Accessory Sources
Since furniture and accessories aren't typically part of renovation costs, I didn't add them into the budget. Some of these items we already had, and some we switched out to better fit our new kitchen.
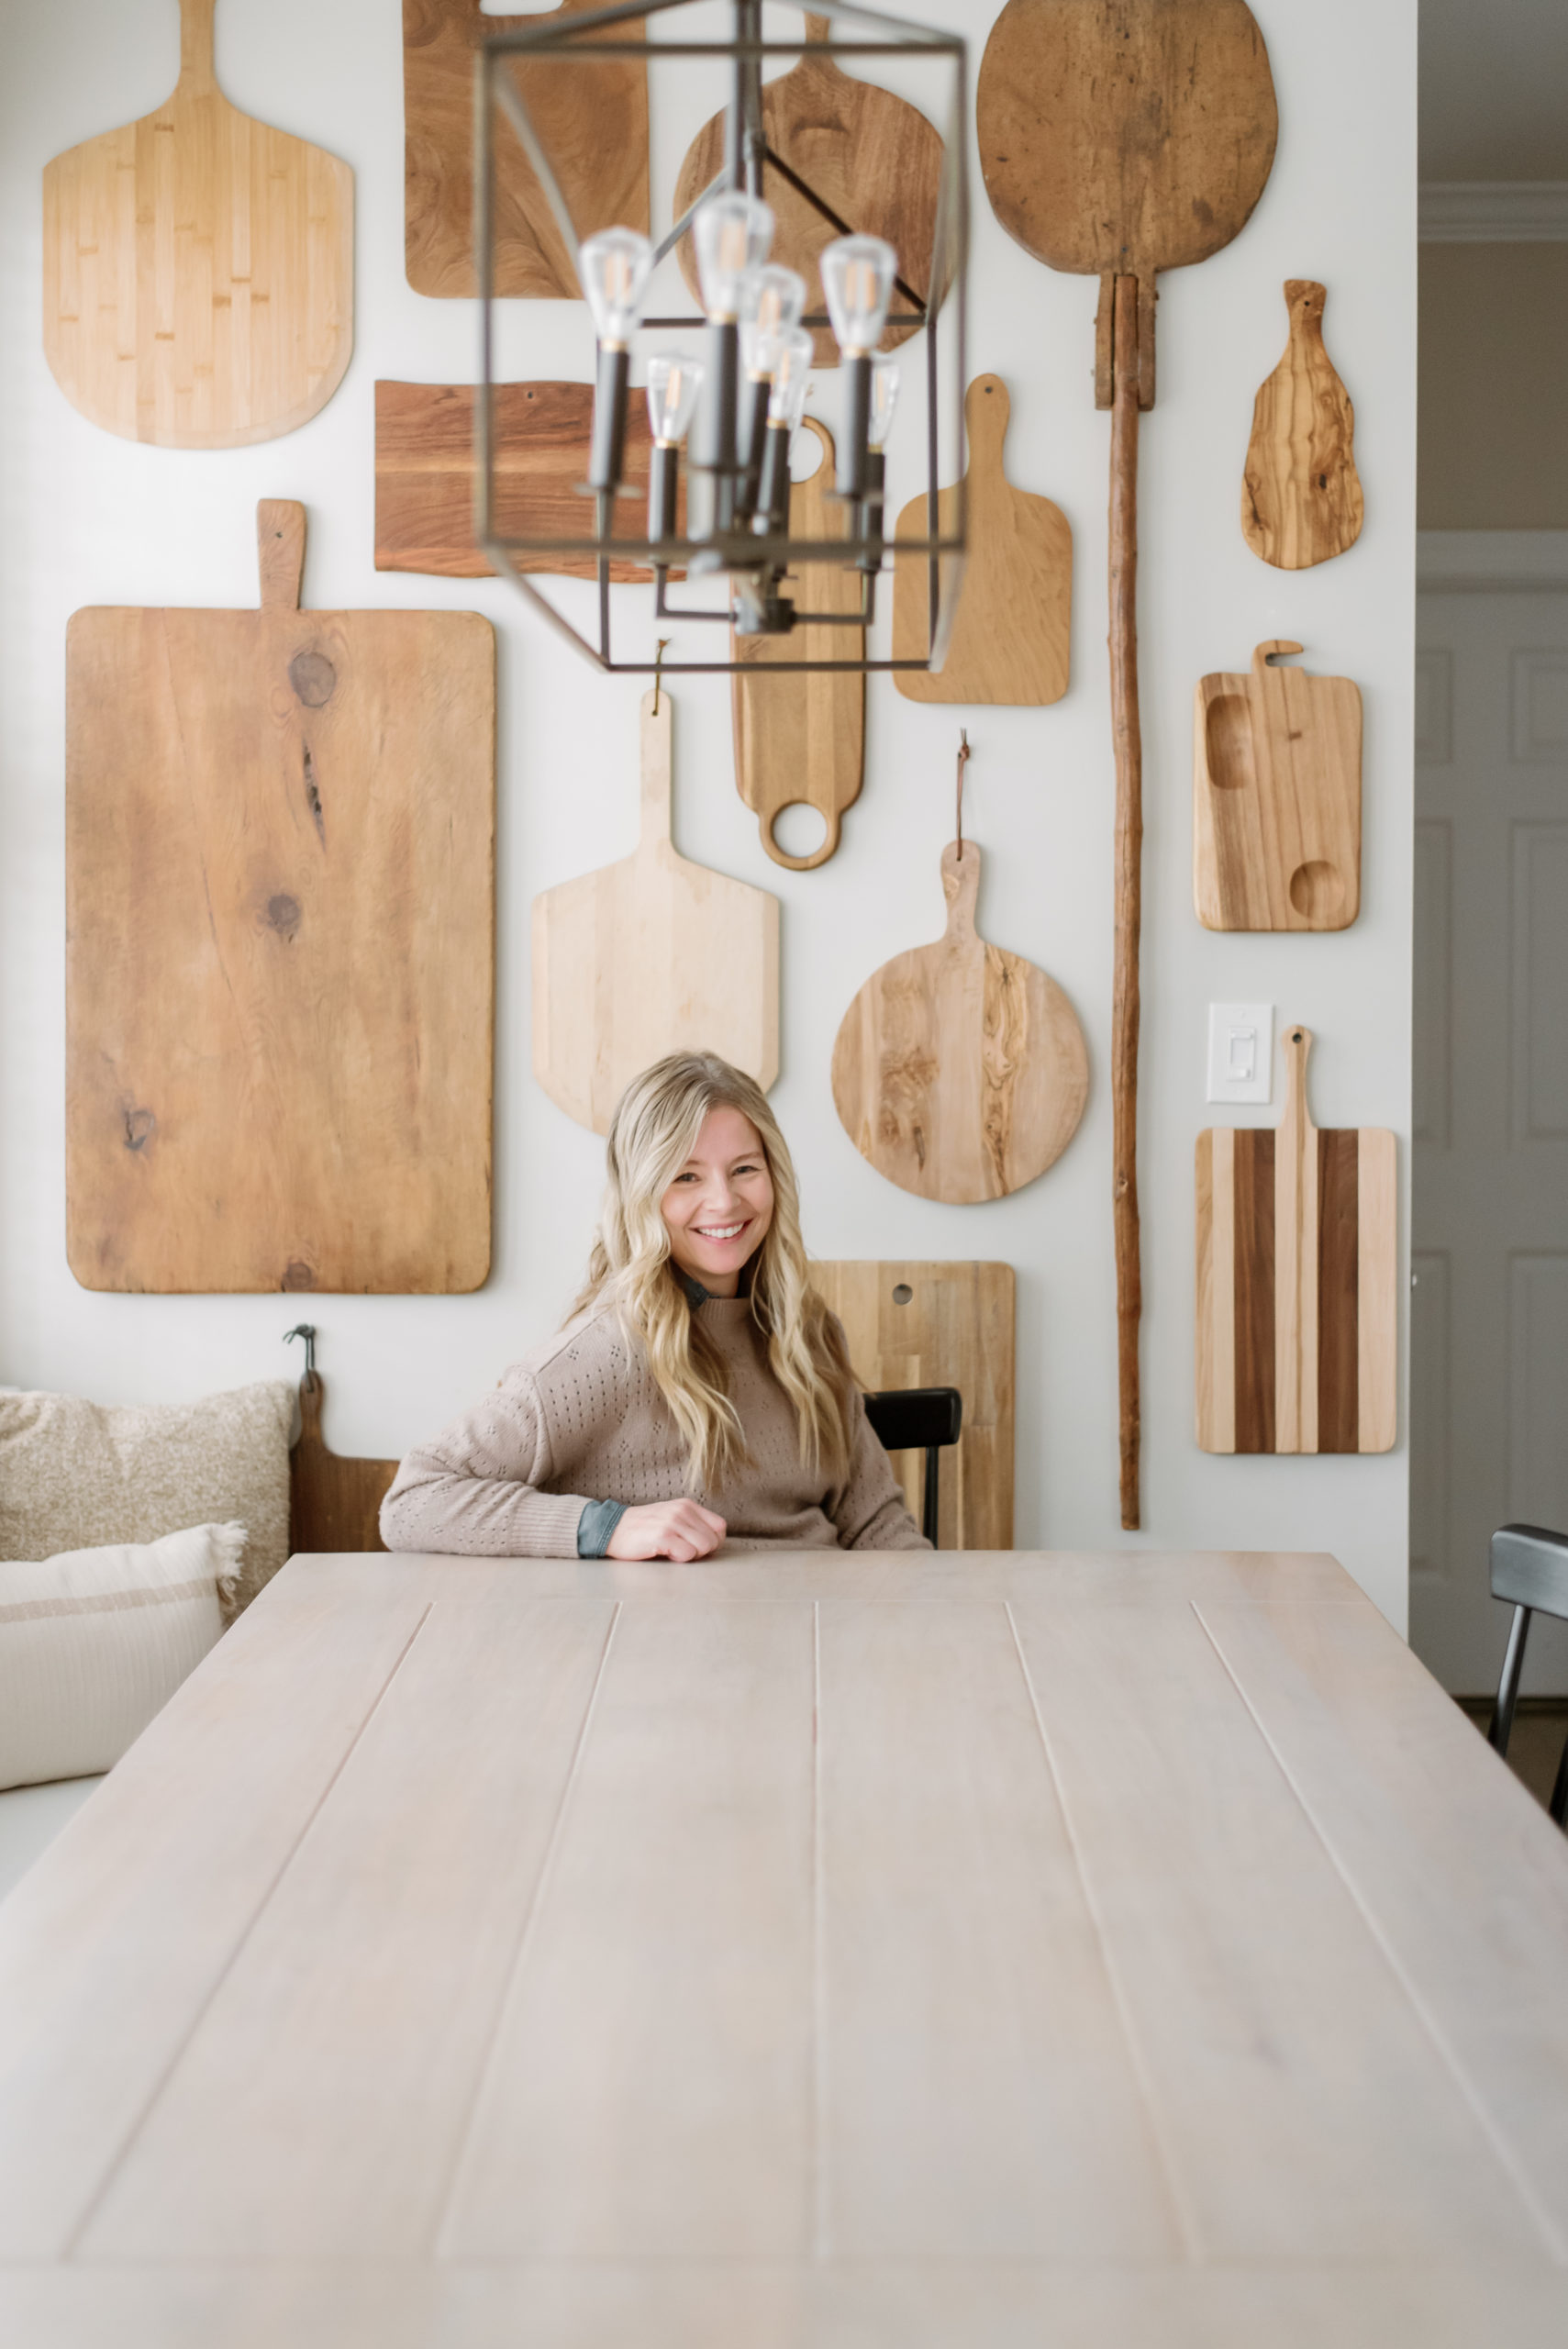
One of my absolute FAVORITE features is the wall of cutting boards above our dining table. It adds so much warmth and old-world character to our home. I collected cutting boards for a long time leading up to the renovation, and some of them are vintage. Others came from stores like Home Goods. But sorry—I don't have any links for those!
Furniture
I love the barstools and dining table I found at Downeast Home! They offer really high-end, high-quality products at a more affordable price than comparable furniture stores.
Dishes
I love the look of all white dishes for everyday use. Plus, ours sit out in the open on our floating shelves so I wanted to make sure they fit well with the look of the kitchen. I've had these ones from Crate and Barrel for years and they've held up so well. I also love the glass-looking acryclic cups that are very kid-friendly.
[show_shopthepost_widget id="4949309"]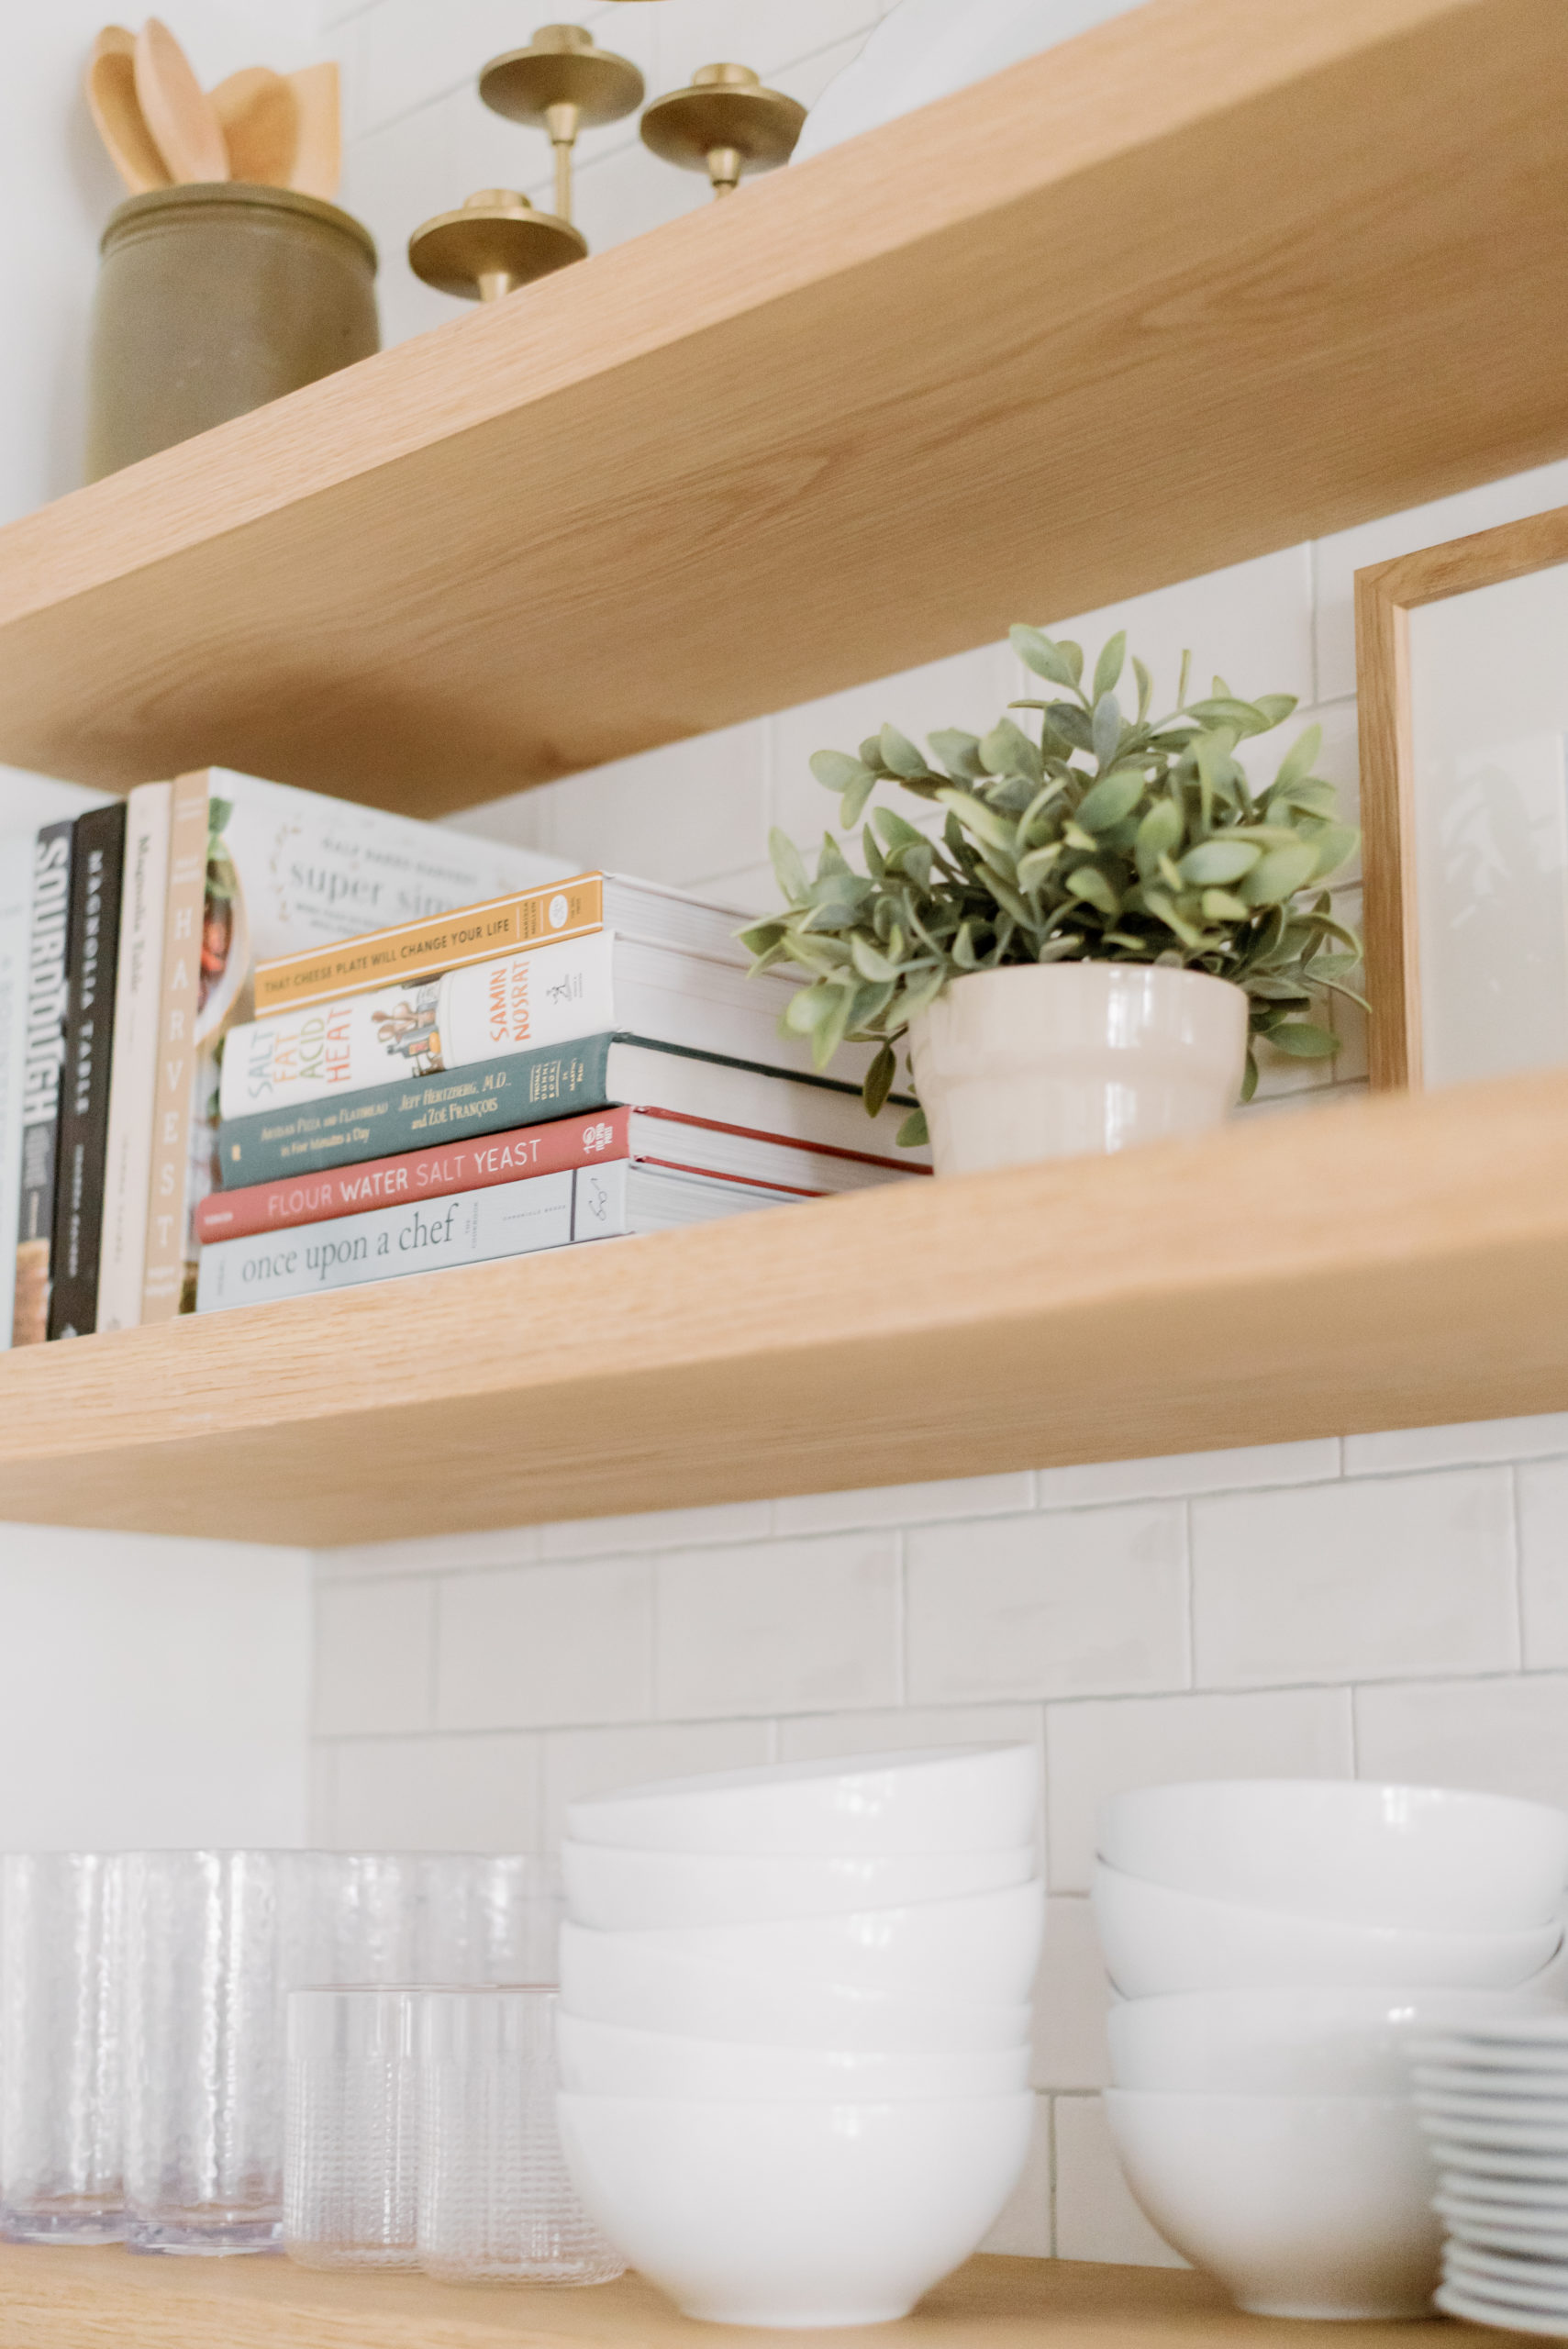
Accessories
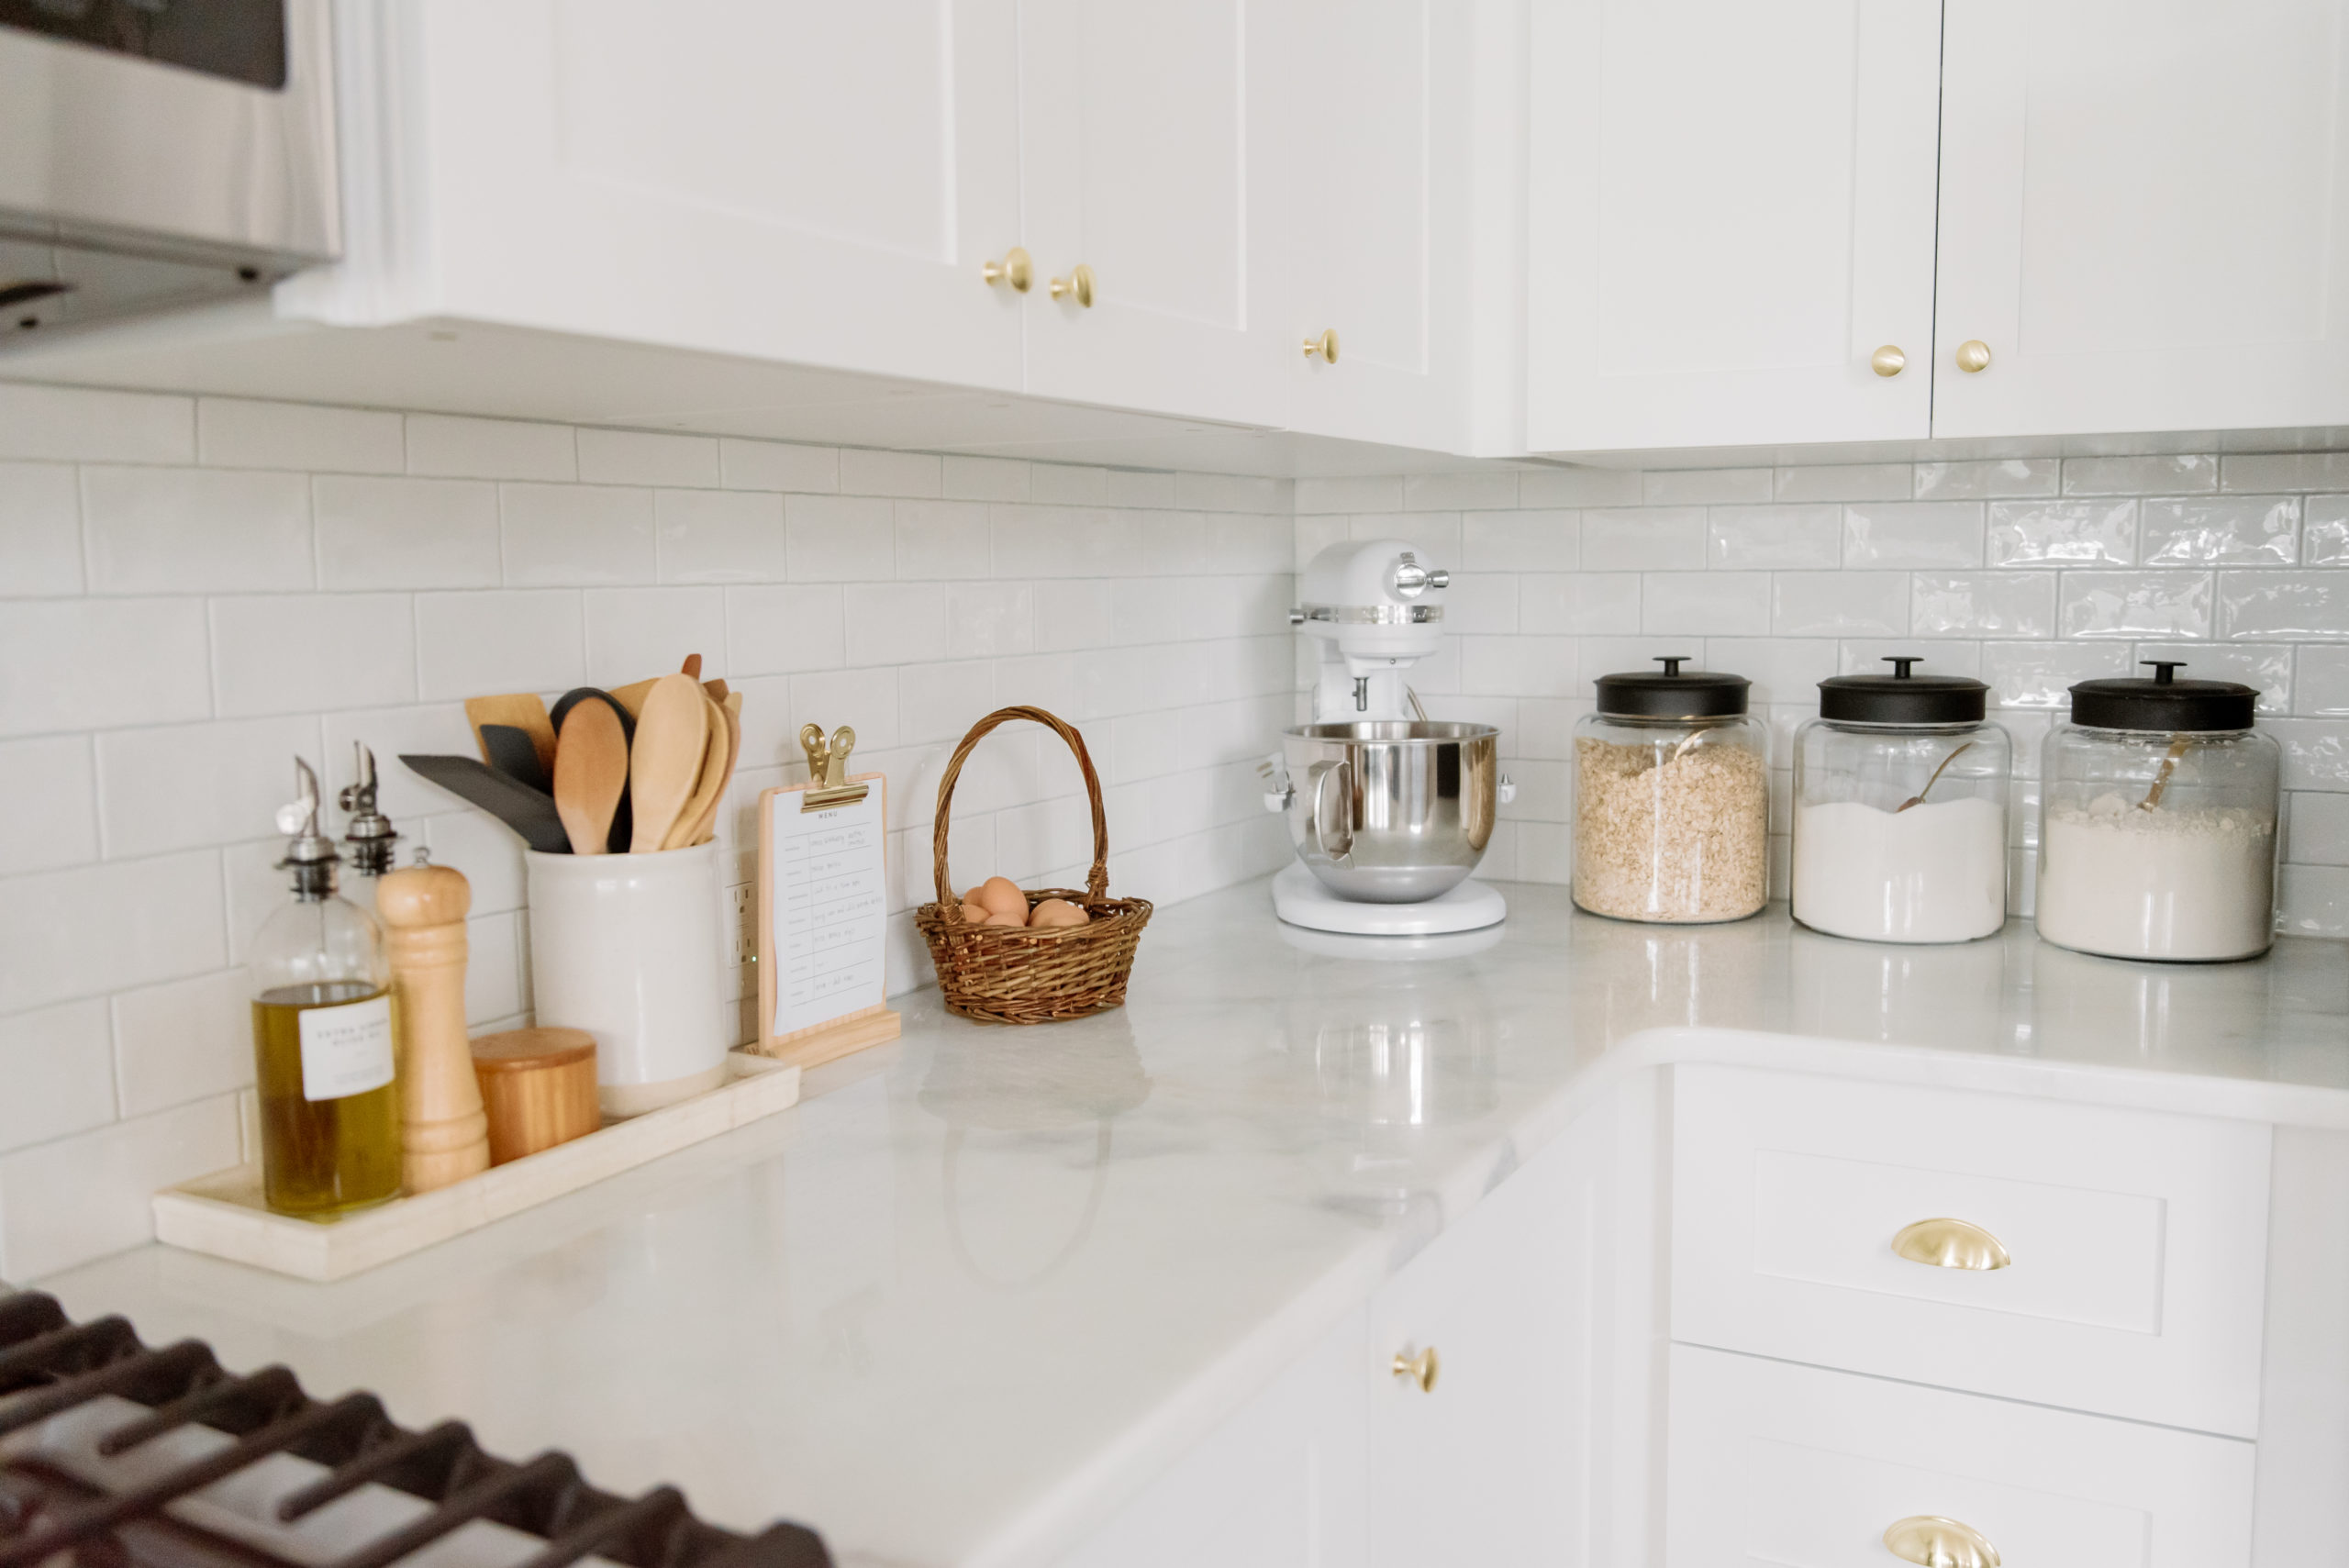
- Ceramic canisters
- Smeg toaster
- Bread/cake stand
- Hyacinth baskets
- KitchenAid Stand Mixer
- Oil dispensers
- Artwork above microwave (mine is vintage, but this one is similar)
- Hand lotion dispenser (Get 15% off with code HOMEANDKIND)
- Hand soap dispenser (Get 15% off with code HOMEANDKIND)
- Dispenser tray (Get 15% off with code HOMEANDKIND)
- Rug (mine is vintage, but this one is similar)
- Glass canisters (for oats, flour, and sugar)
Paint Sources
- Cabinets + trim + tongue and groove around the peninsula: Sherwin Williams Extra White (Nieu Cabinets lables this color Winter White)
- Walls: Sherwin Williams Accessible Beige at 50%
- Floor stain: 50% Minwax Classic Gray, 50% Minwax Weathered Oak
- Floating shelf stain: No stain - just a clear coat of water-based polyurethane

Helpful Resources
Every kitchen is so unique, so I didn't want to make this post a full-on tutorial. But I do want to share some of the resources that helped us along the way! The IKEA kitchen planner and YouTube were definitely essential parts of this process!
- IKEA kitchen planner
- How to install an island/peninsula
- IKEA kitchen installation guide
- How to install IKEA kitchen cabinets
- How to install floating shelves
- Using the Sheppard Brackets equipment
- Installing a non-IKEA farmhouse sink
- Tools needed for IKEA kitchen installation
- Adjusting the drawer and door fronts
Closing Thoughts
There were certainly points when the kitchen renovation felt like it was dragging on forever. But we crossed the finish line, and I couldn't be happier about it!
If you're looking to renovate a kitchen on a budget, the IKEA cabinets with Nieu fronts are an amazing option. This route allowed us to cut our costs by 50%, and we're so pleased with how it turned out!
Here's to many new memories made in this kitchen with family and friends!
I like to hang out on Instagram and share more in-depth tutorials on everything I make, create, and organize. Come be a part of our Home & Kind Instagram community.


