

We've been on a roll with house projects around here! Once we overhauled our kitchen and laundry room, we decided to tackle our very petite pantry space to make it more functional for our family.
As with the kitchen and laundry room, we used IKEA kitchen planner to create a customized cabinet space that perfectly fit into the old pantry dimensions.
Even though the new pantry is still small, it is SO much more functional and organized. I've been super happy with it so far!
How I Created a More Functional Pantry
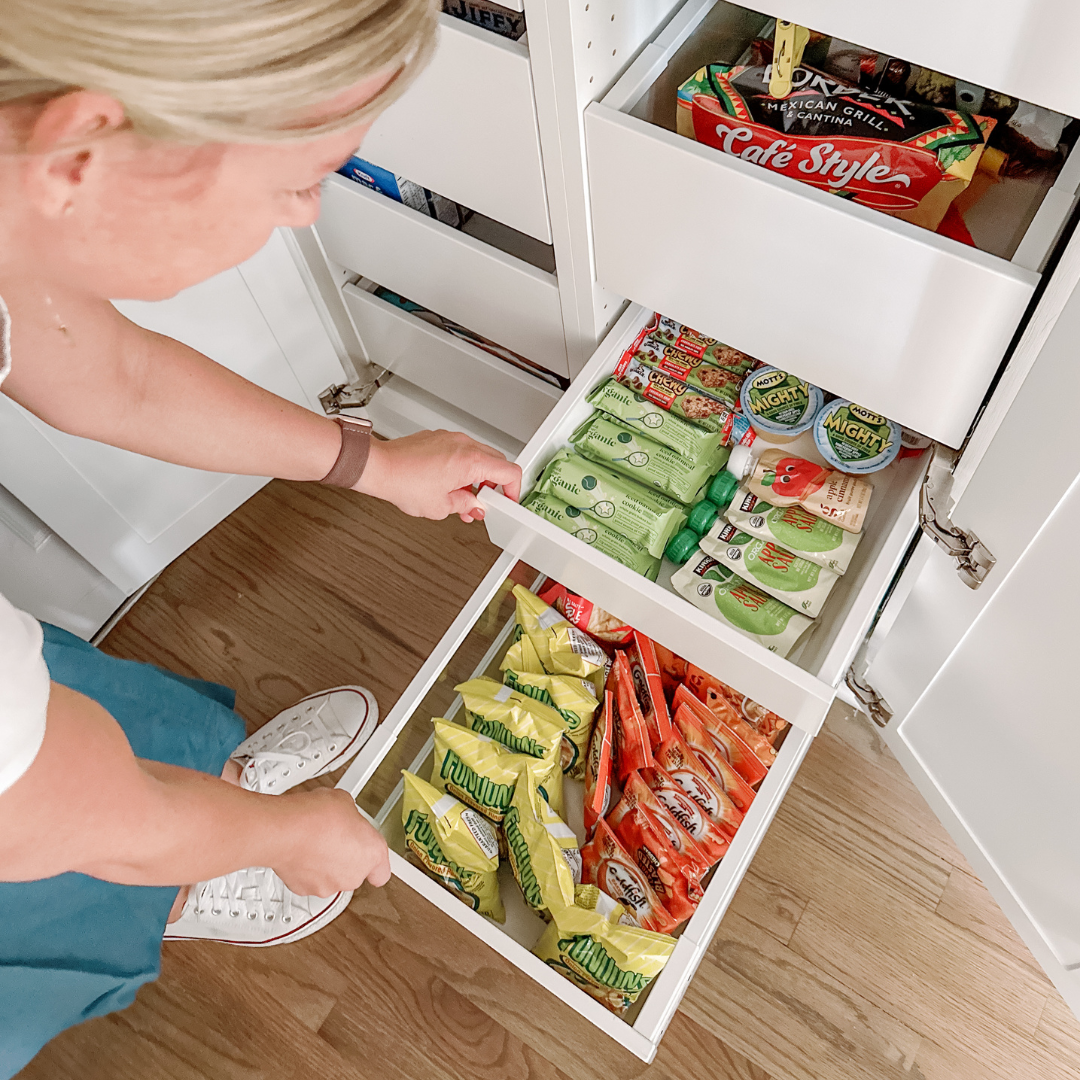
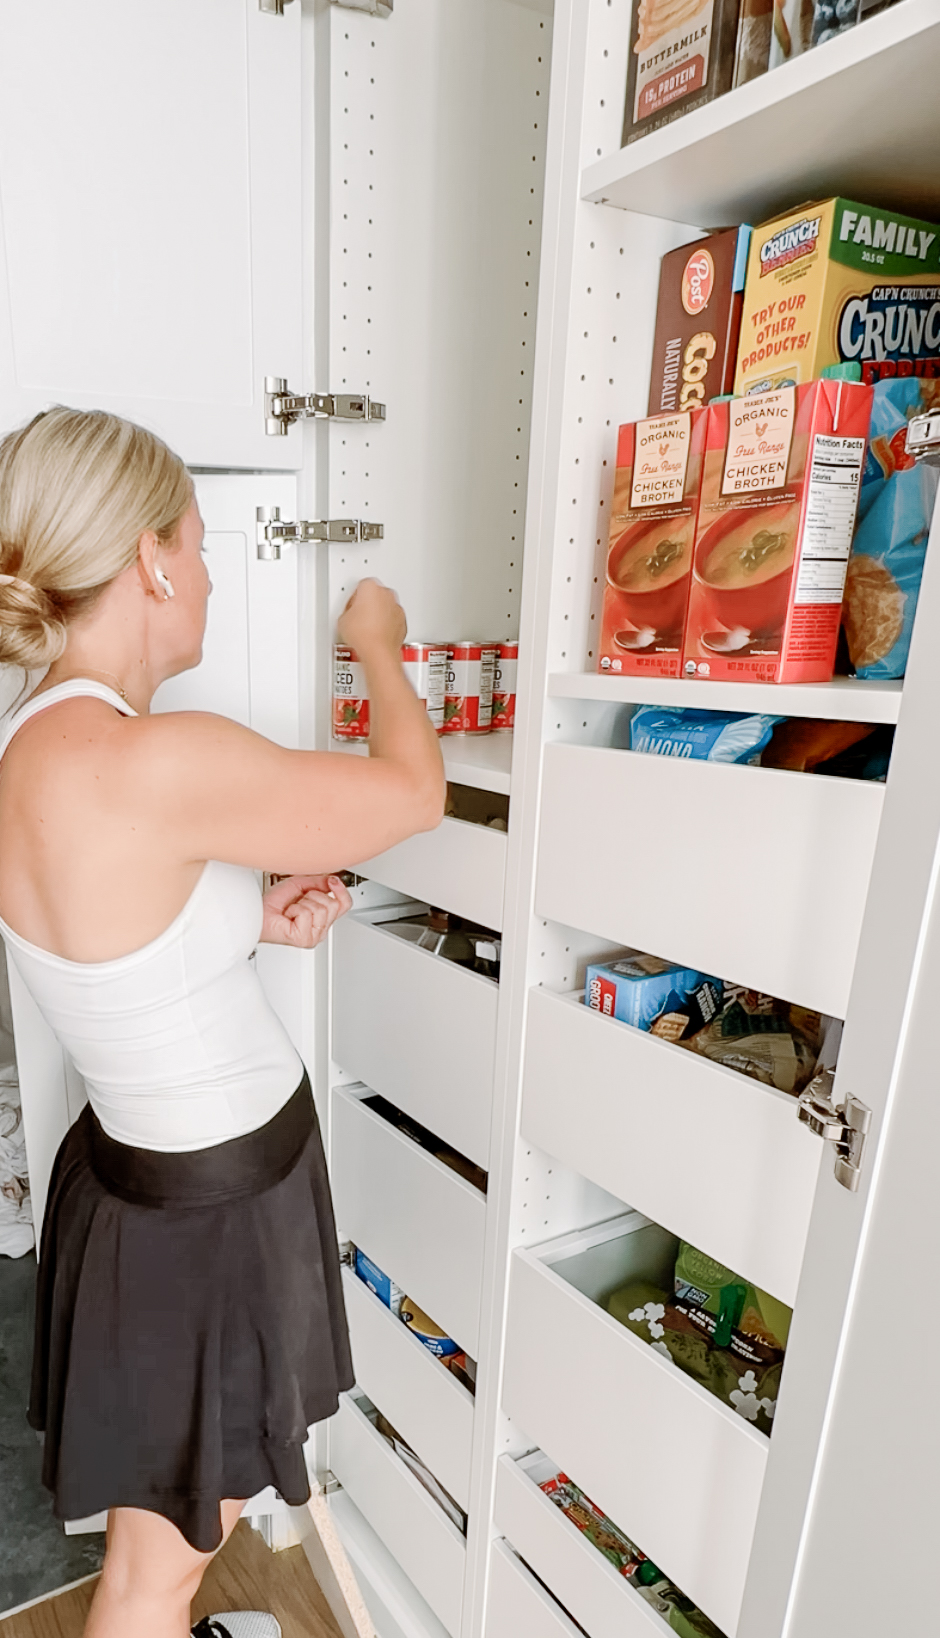
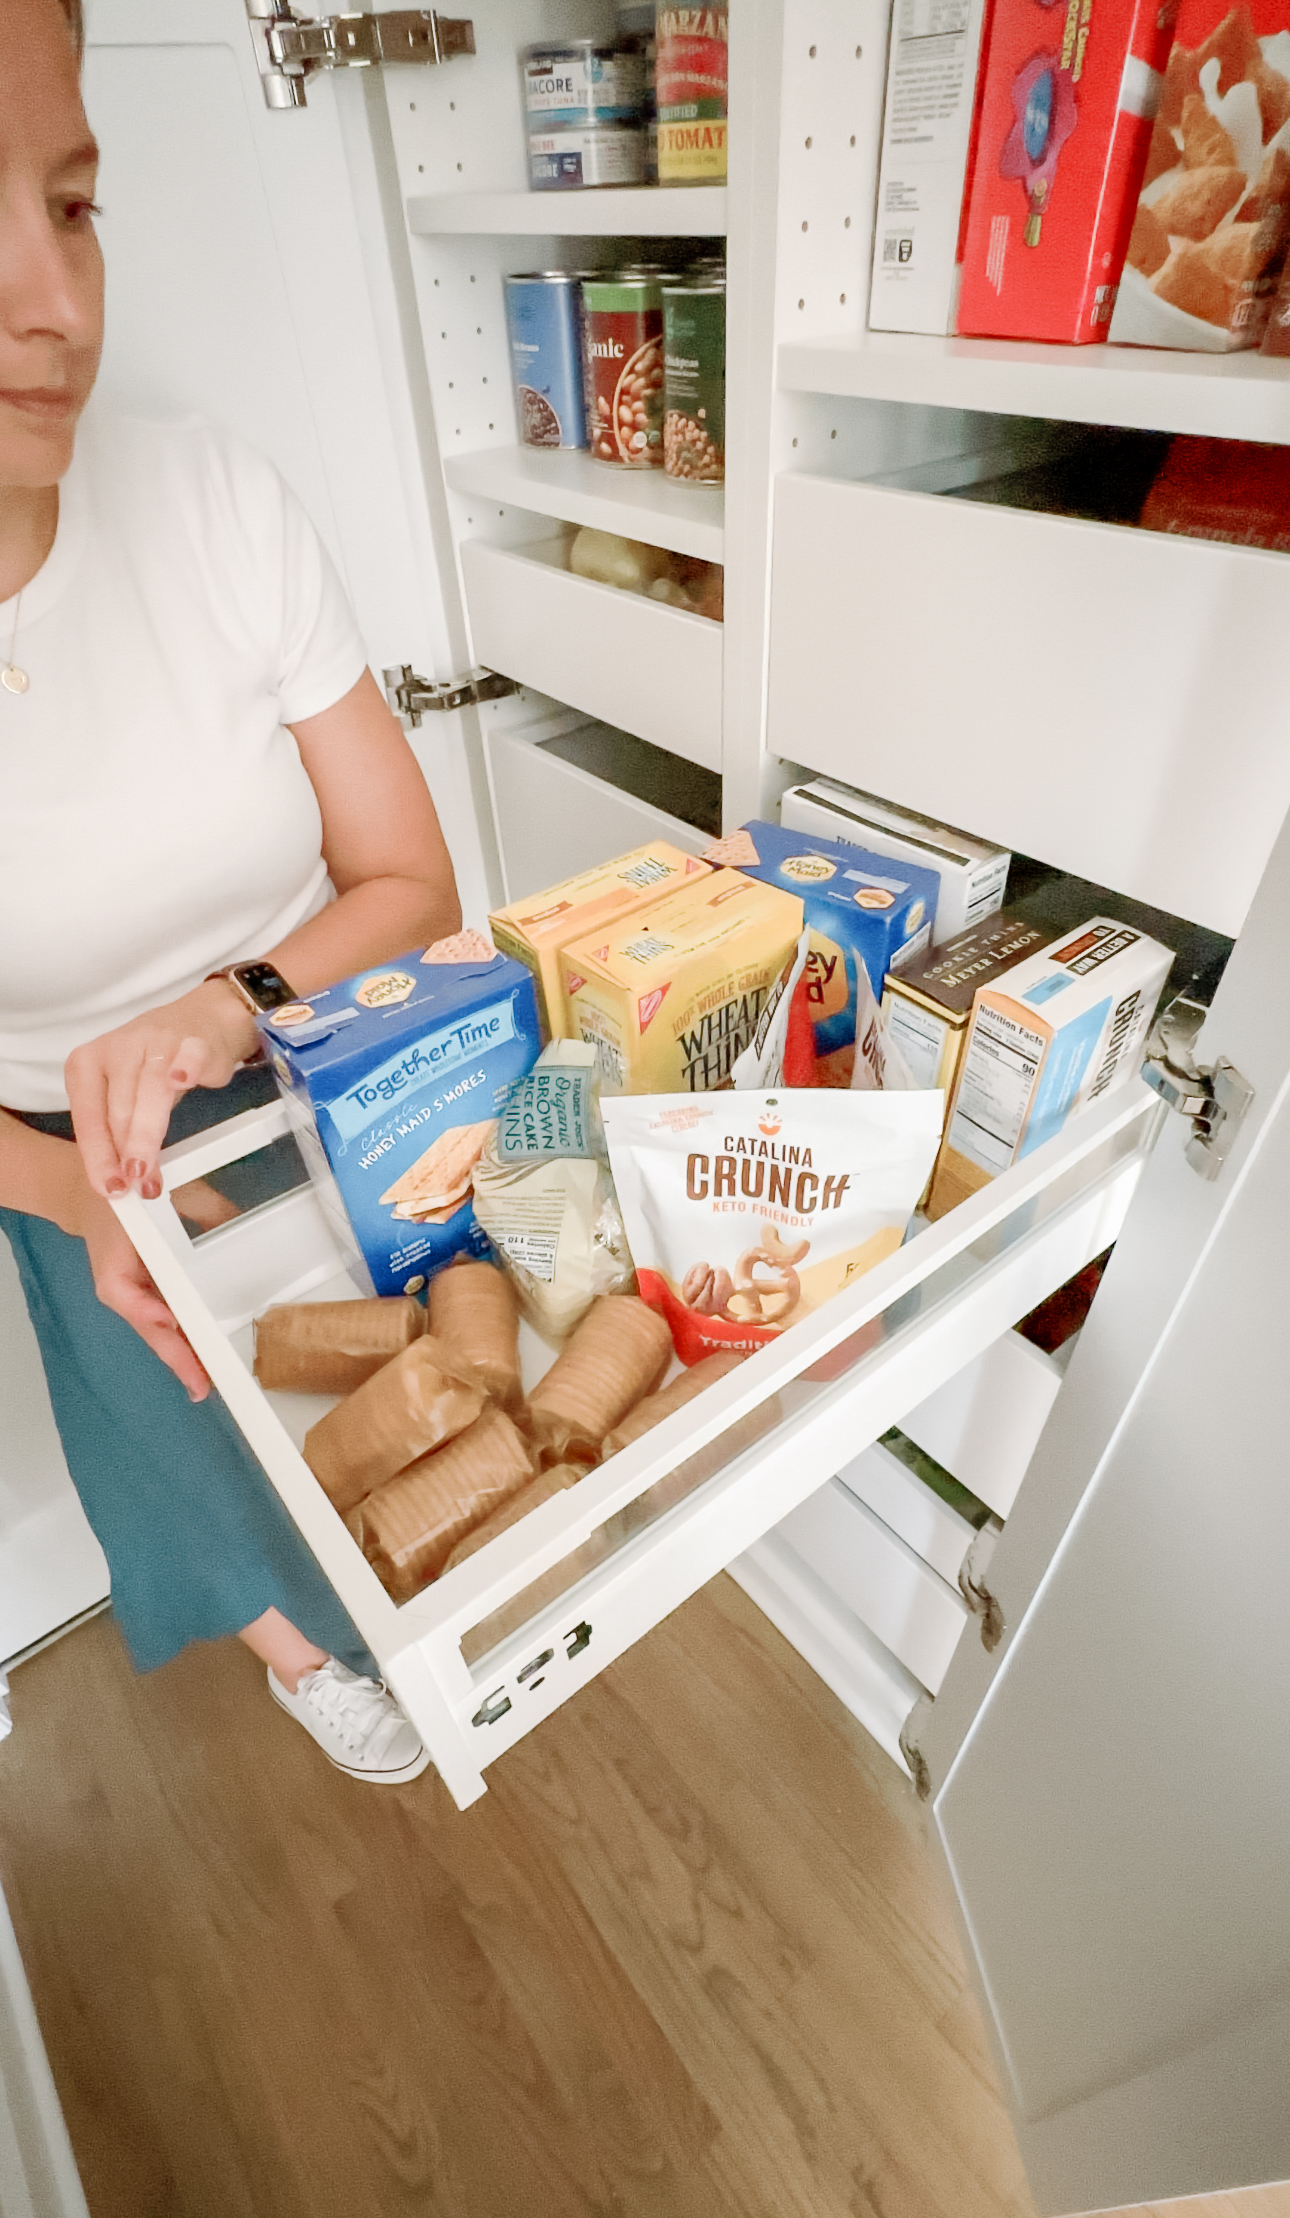
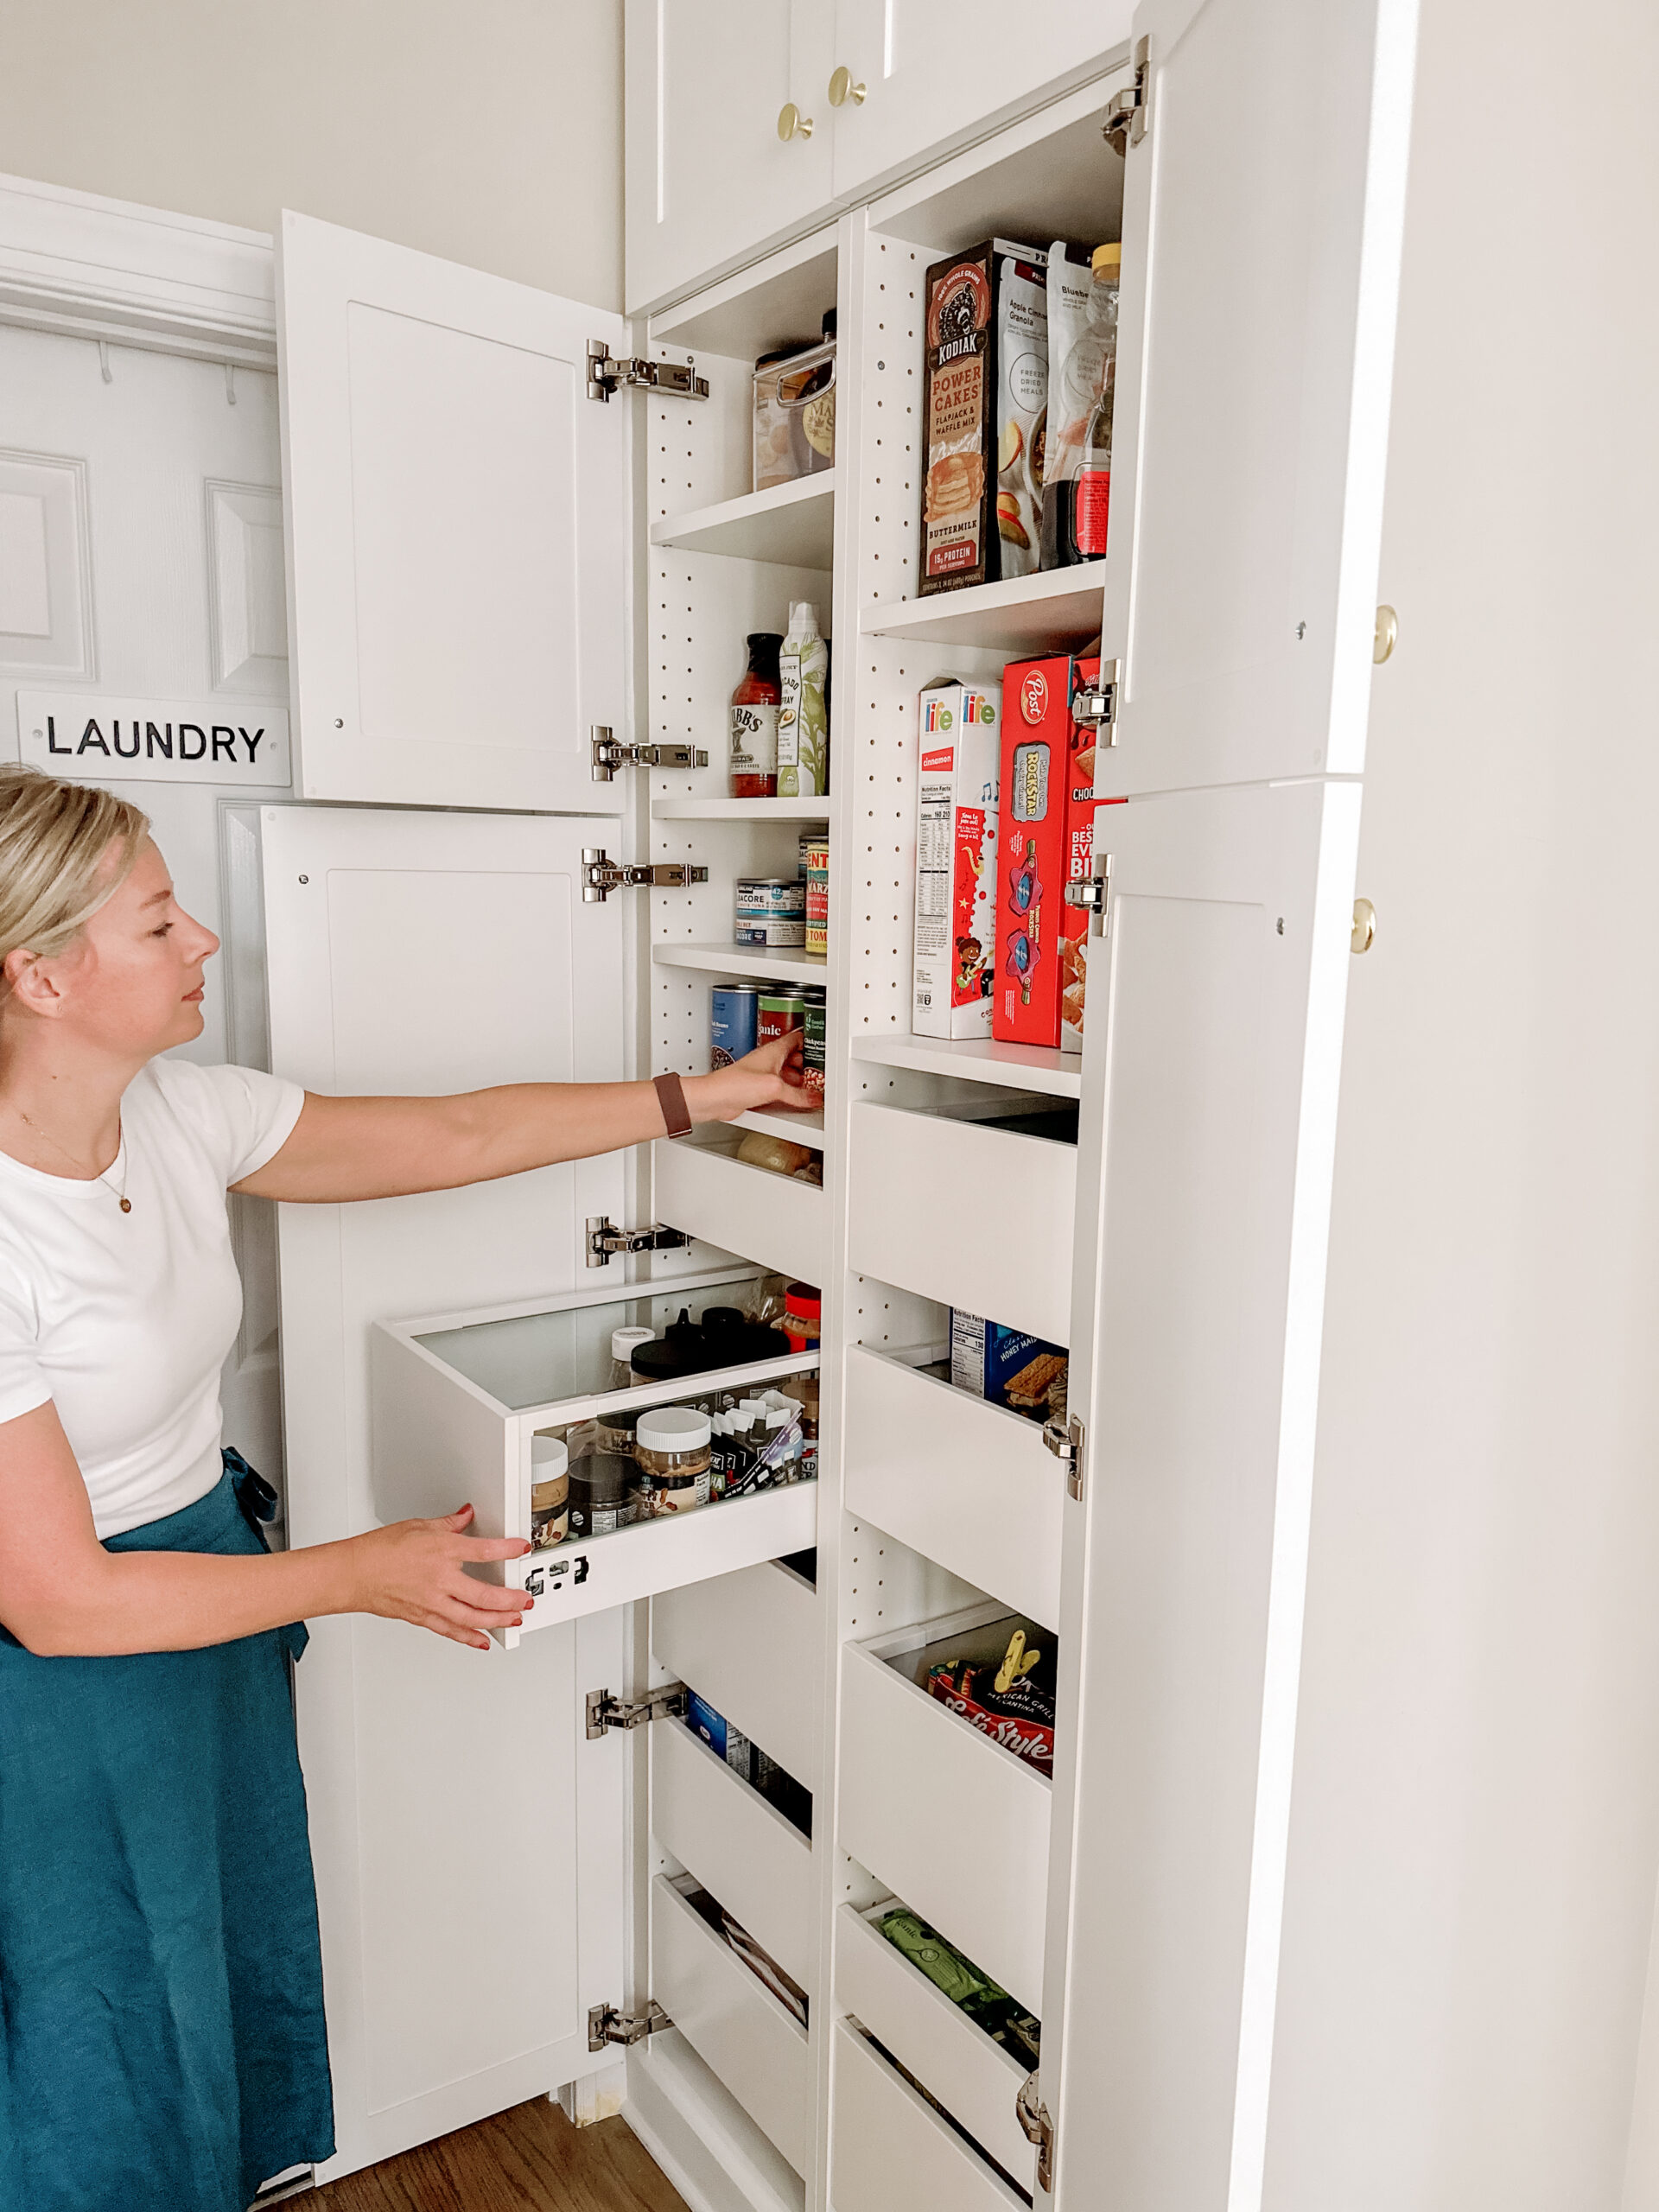
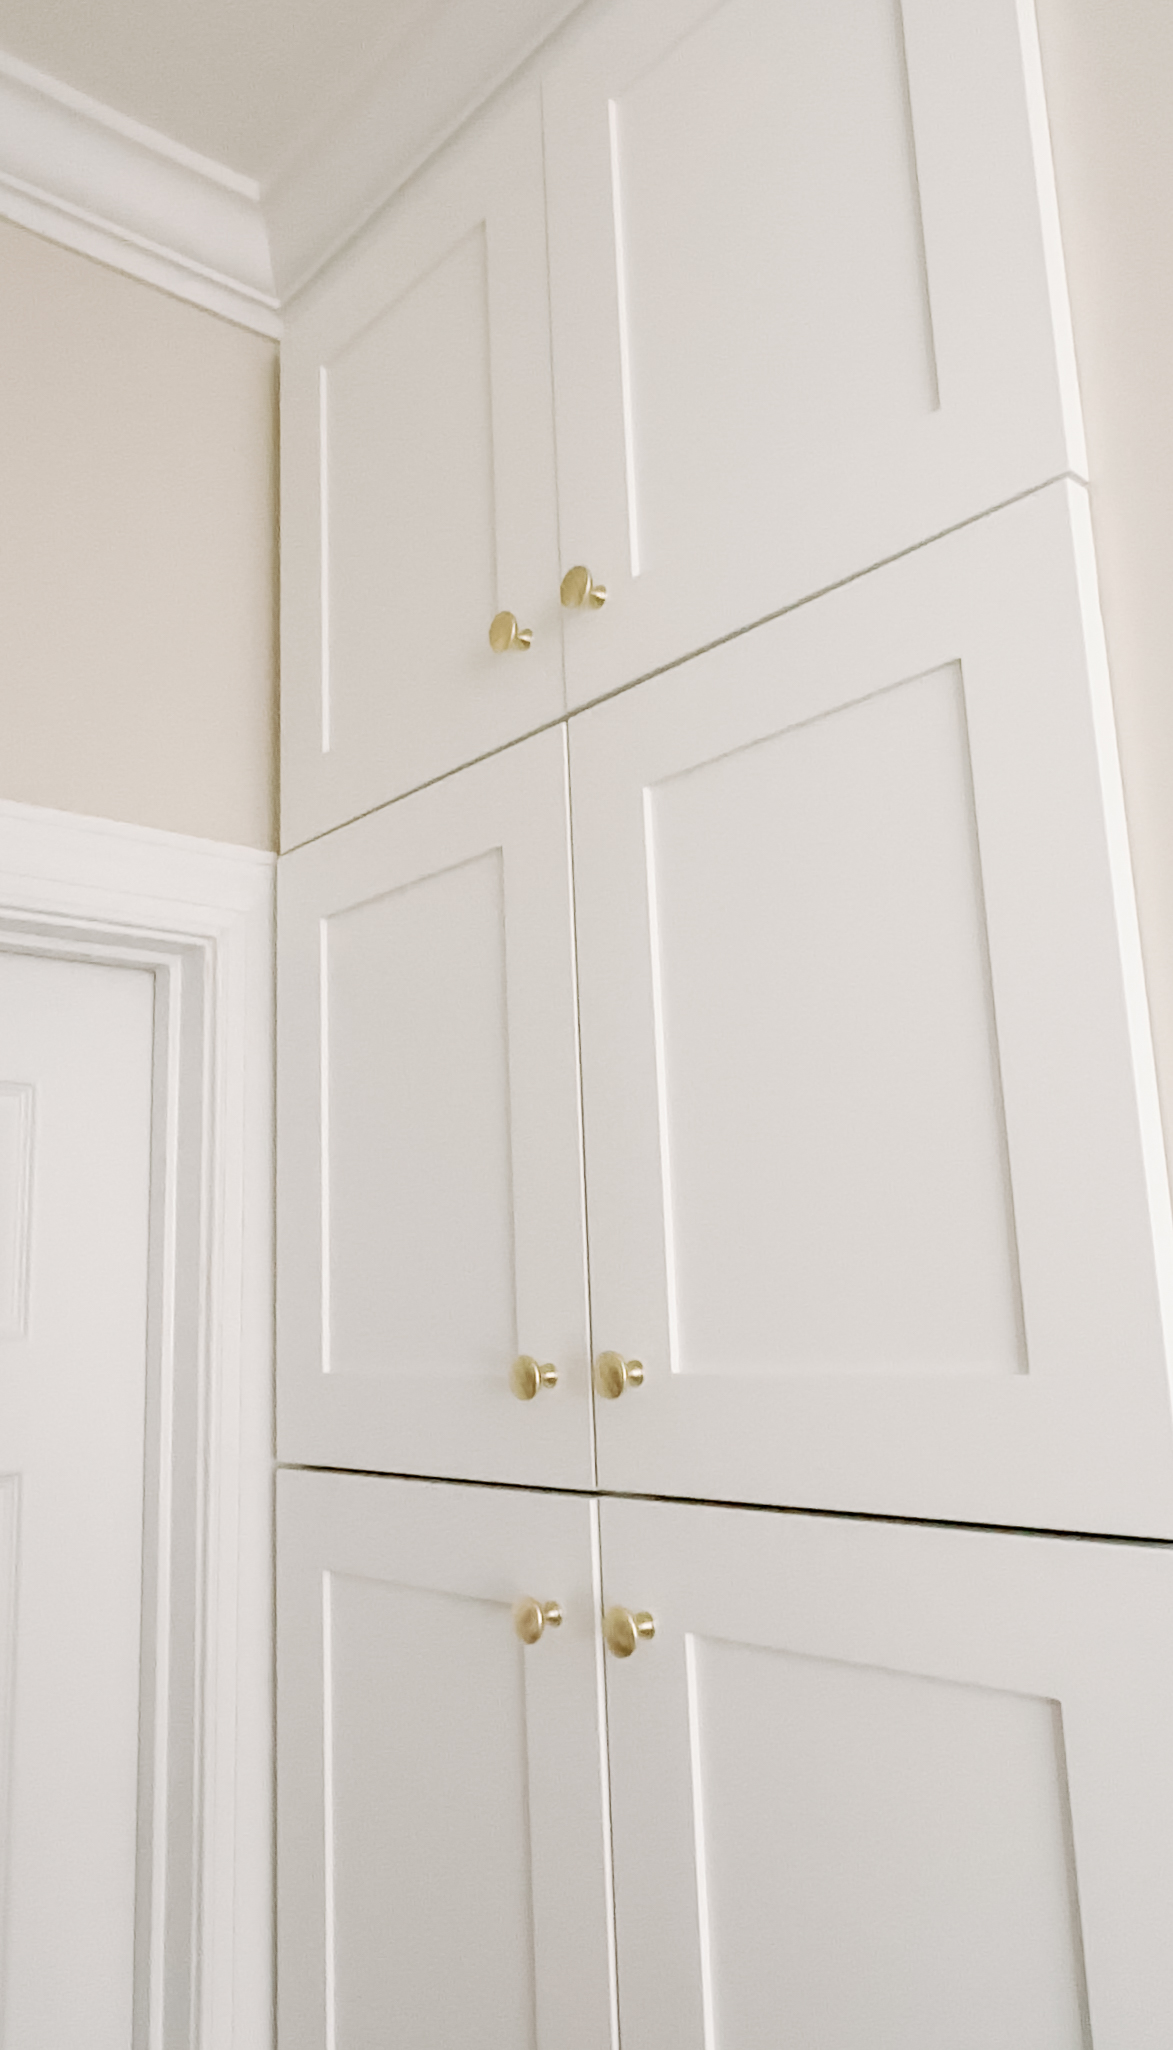
One of the main things I really wanted with this pantry was more drawer space. Drawers feel so much more functional than a deep shelf. You can easily get to everything in the back and nothing gets forgotten in the depths of the cupboard.
Our drawers are all pretty narrow (just 15 inches wide), so they act as perfect storage containers for food. I didn't even have to buy additional containers to organize the inside of the drawers, which is so nice!
Obviously, you can only do drawers up to a certain height, so shelves were necessary for anything about 4.5 feet. We decided to store overflow/bulk items on the highest shelves that are hard to reach. We use a stool to access those items when we're ready to refill the lower shelves!
Planning the Design
The tricky thing about IKEA is that everything is a la carte. This allows you to customize your space but also makes it a little overwhelming. For this reason, I HIGHLY recommend measuring the dimensions of your space and then using the IKEA kitchen planner.
This amazing tool puts together the entire shopping list for you. If you don't use it, you'll have to add all of the hinges and hardware separately and you could risk forgetting some key elements of the design.
We also used Nieu Custom Cabinet Doors (in Winter White) to give our kitchen a more custom look. I bought these cabinet fronts when I was ordering everything for our kitchen — it's just taken me a year to finally finish the pantry space!
Executing the Design


We really figured out the execution as we went on this one. We had planned to mount the cabinets on the back wall, but after demo, we realized that there weren't any studs in the back wall. So, instead we built a base for the cabinets to rest on and secured them to the ground, to each other, and to the side walls to make sure they were secure. Then we filled in the gaps between the cabinets and drywall by using mesh tape and drywall compound, filler wood pieces, and caulk.
Pantry Links and Sources
- SEKTION High cabinet frame, white, 15x24x80", $118 per unit ($236 total)
- SEKTION Wall top cabinet frame, white, 30x24x20", $79 per unit ($79 total)
- MAXIMERA Drawer, high, white, 15x24", $48 ($192 total)
- UTRUSTA Drawer front, high, 15", $17 ($68 total)
- MAXIMERA Add-on side for drawer, high, glass, 23 5/8", $18 ($72 total)
- MAXIMERA Drawer, medium, white, 15x24", $45 ($180 total)
- UTRUSTA Drawer front, medium, 15", $14 ($56 total)
- MAXIMERA Add-on side for drawer, medium, glass, 23 5/8", $16 ($64 total)
- MAXIMERA Drawer, low, white, 15x24", $38 ($76 total)
- UTRUSTA Drawer front, low, 15", $12 ($24 total)
- UTRUSTA Hinge w b-in damper for kitchen, 153°, $24 ($192 total)
- UTRUSTA Shelf, white, 15x24", $14 ($42 total)
- AXSTAD Door, matt white, 15x60", $178 ($356 total)
- AXSTAD Door, matt white, 15x20", $66 ($264 total)
- Brushed Brass Knobs $2 per knob ($12 total)
TOTAL: $1,913
Additional Links
- IKEA kitchen planner
- Nieu Custom Cabinet Doors (in Winter White). You can buy cabinet fronts at IKEA, but we decided to use Nieu cabinet doors to give our kitchen a more custom look. I bought these cabinet fronts when I was ordering everything for our kitchen — it's just taken me a year to finally finish the pantry space!
- Joint compound mesh tape (for filling in seams and gaps between cabinets and drywall)
- Joint compound (for smoothing and filling in seams)
I like to hang out on Instagram and share more in-depth tutorials on everything I make, create, and organize. Come be a part of our Home & Kind Instagram community.


